Water Dispenser Repair in Westlands

Water Dispenser Repair in Westlands: Ensuring Hydration without Hassles

Water Dispenser Repair in Westlands : Water dispensers have become an essential part of modern households and offices, providing a convenient source of clean and cold water. However, like any other appliance, water dispensers can encounter problems over time. From leaky faucets to malfunctioning cooling systems, these issues can disrupt the daily routine and affect your access to fresh, clean water. This is where water dispenser repair services come to the rescue, ensuring that you can enjoy uninterrupted hydration without hassles.

The Importance of Water Dispenser Repair Services

  1. Expertise: Repairing a water dispenser requires specialized knowledge and skills. Trained technicians understand the inner workings of these appliances, making them capable of diagnosing and fixing a wide range of issues efficiently.
  2. Cost-Effective: Opting for repair services is often more cost-effective than replacing a malfunctioning water dispenser with a new one. Repairing parts or addressing minor issues can save you a significant amount of money in the long run.
  3. Environmentally Friendly: Repairing appliances rather than disposing of them helps reduce electronic waste, contributing to a greener, more sustainable environment.
  4. Convenience: Dealing with a faulty water dispenser can be inconvenient. A reliable repair service provider can quickly resolve the problem, minimizing disruptions to your daily routine.

Common Water Dispenser Issues

Water dispenser repair services are equipped to address a variety of problems, including:

  1. Leakages: Leaky faucets or water containers can cause water wastage and damage to your surroundings.
  2. No Cooling: When the water dispenser fails to cool the water, it can be frustrating, especially during hot weather.
  3. No Heating: Cold water dispensers with a heating option can malfunction, leaving you without access to hot water.
  4. Strange Noises: Unusual sounds coming from the dispenser can be indicative of underlying issues.
  5. Clogged Filters: Filters can become clogged with impurities over time, affecting the quality of the water.

The Repair Process

When you contact a water dispenser repair service, here’s what you can expect:

  1. Diagnosis: The technician will inspect your water dispenser to identify the root cause of the problem. This may involve checking for leaks, examining the electrical components, and testing the cooling or heating systems.
  2. Repairs: Once the issue is identified, the technician will proceed with the necessary repairs. This could involve replacing faulty components, cleaning clogged filters, or fixing wiring problems.
  3. Testing: After the repairs are completed, your water dispenser will be thoroughly tested to ensure that it is functioning correctly.
  4. Maintenance: Some repair services also offer routine maintenance to prevent future issues and extend the lifespan of your water dispenser.

Water dispenser repair services play a vital role in ensuring that you have access to clean, cold, and hot water when you need it most. By addressing common issues, these services save you money, reduce waste, and provide convenience. When your water dispenser encounters problems, don’t hesitate to reach out to a reliable repair service provider to keep the hydration flowing smoothly in your home or office.

Water Dispenser repair for all Types of Water Dispensers

Title: Exploring the Different Types of Water Dispensers

Water dispensers have become a common fixture in homes, offices, and public spaces, providing convenient access to clean and refreshing drinking water. There are several types of water dispensers available to suit various needs and preferences. In this article, we’ll explore the most common types of water dispensers.

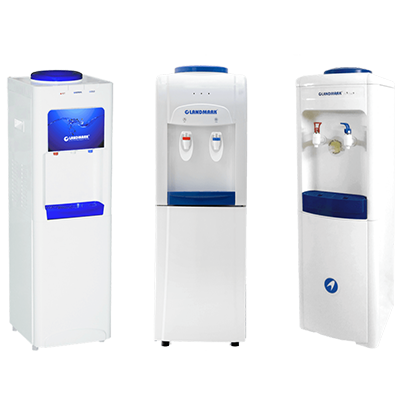
**1. Bottled Water Dispensers:

  • Top-Loading: These dispensers have a water bottle placed on top, which feeds water into the unit. They are easy to use and come in both hot and cold water options.
  • Bottom-Loading: In these dispensers, the water bottle is hidden in the base of the unit. They offer a sleeker appearance and eliminate the need for heavy lifting when changing bottles.
  • Countertop: Compact and space-saving, countertop bottled water dispensers are suitable for small kitchens or offices. They typically accommodate 3- to 5-gallon water bottles.

**2. Point-of-Use (POU) Water Dispensers:

  • Plumbed-In (Direct Connection): These dispensers are connected directly to the water supply, eliminating the need for water bottles. They provide a continuous supply of filtered and purified water and are cost-effective in the long run.
  • Under-Sink: Installed beneath the kitchen sink, under-sink POU dispensers connect to the water line and dispense filtered water through a separate faucet. They are out of sight and provide a clean, clutter-free look.

**3. Wall-Mounted Water Dispensers:

  • **Wall-mounted water dispensers are commonly found in public places like schools, offices, and gyms. They dispense cold water and are often used in conjunction with a water filtration system.

**4. Refrigerator Water Dispensers:

  • Built-In: Many modern refrigerators come equipped with built-in water dispensers that offer cold water, ice, and sometimes even hot water. These dispensers are convenient and save space.
  • External: Some refrigerators have external water and ice dispensers on the front of the door. These provide easy access to chilled water and ice without opening the fridge.

**5. Tabletop Water Dispensers:

  • **Tabletop water dispensers are small, portable units that can be placed on a countertop or table. They are perfect for small gatherings or events and typically dispense both hot and cold water.

**6. Hot Water Dispensers:

  • **Hot water dispensers are designed specifically for dispensing hot water. They are commonly used in kitchens for quickly heating water for tea, coffee, or instant meals.

**7. Sparkling Water Dispensers:

  • **For those who enjoy carbonated beverages, sparkling water dispensers carbonate still water on demand. They are popular for making homemade sodas and carbonated drinks.

The availability of various types of water dispensers allows consumers to choose the one that best fits their specific needs, whether it’s for home, office, or public use. Factors such as space, convenience, and the desire for bottled or bottleless solutions play a role in determining which type of water dispenser is the most suitable. Ultimately, these appliances make it easier than ever to stay hydrated with fresh and clean water.

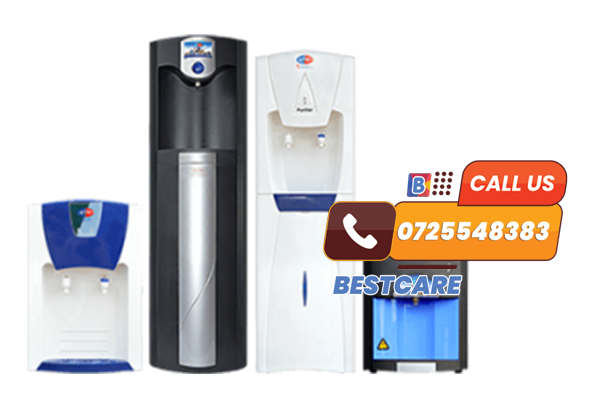
Water Dispenser repair in Westlands for all common water dispenser brands

Common water dispenser brands offer a convenient solution for both homes and offices to access clean, filtered water easily. These brands have established themselves as reliable providers of hydration solutions, offering a range of features and styles to cater to diverse consumer needs. Here are some well-known water dispenser brands:

  1. Primo Water: Primo Water is a popular choice for water dispensers, known for its affordability and variety. They offer a range of products, including top-loading and bottom-loading dispensers, as well as countertop models. Primo’s dispensers often feature innovative designs and are compatible with their exchangeable water bottles.
  2. Avalon: Avalon is another trusted brand in the water dispenser industry. They are known for their sleek and modern designs, often featuring a combination of hot and cold water dispensers. Avalon’s products focus on energy efficiency and use eco-friendly materials.
  3. Whirlpool: Whirlpool is a household name known for its kitchen appliances, and they also offer a line of water dispensers. Whirlpool dispensers typically come with advanced water filtration systems, ensuring the water is clean and safe to drink. They offer both top-loading and bottom-loading options.
  4. Honeywell: Honeywell, a renowned brand in the home appliance industry, manufactures water dispensers that prioritize user convenience and water purity. They offer a variety of models, including freestanding and tabletop options, with features like adjustable temperature settings.
  5. Vitapur: Vitapur specializes in water dispensers with advanced filtration technology. Their products are designed to remove impurities and contaminants from tap water, providing consumers with a clean and refreshing drinking experience. Vitapur offers a variety of dispenser styles, including top-loading and bottom-loading models.
  6. Hamilton Beach: Known for their kitchen appliances, Hamilton Beach offers a selection of water dispensers that are user-friendly and stylish. Their products often include features like hot, cold, and room temperature water dispensing options.
  7. Brio: Brio is a brand recognized for its modern and sleek water dispensers. They offer a range of options, including bottom-loading dispensers and countertop models. Brio’s dispensers often feature child safety locks and energy-saving modes.
  8. Primo Stainless Steel: Primo Stainless Steel is a sub-brand of Primo Water, known for its durable and stylish stainless steel water dispensers. These dispensers offer a sleek and modern appearance while providing the convenience of cold and hot water on demand.
  9. Elkay: Elkay is a reputable brand known for its commercial-grade water dispensers and water coolers. They focus on durability and reliability, making their products suitable for heavy usage in offices, schools, and public spaces.
  10. Nestlé Pure Life: Nestlé Pure Life offers a range of water dispensers that complement their bottled water products. Their dispensers are often designed with simplicity and efficiency in mind.

When choosing a water dispenser brand, it’s important to consider factors such as your specific needs, budget, available space, and desired features. Whether you prioritize water filtration, energy efficiency, or design aesthetics, these common water dispenser brands offer a variety of options to cater to different preferences and requirements.

Common Water Dispenser Problems

Common Water Dispenser Problems and Solutions

Water dispensers are convenient appliances that provide chilled, filtered, or hot water at the touch of a button. However, like all machines, they can develop problems over time. Here are some common water dispenser problems and solutions to help you troubleshoot and resolve them.

  1. Water Leaks:
    • Causes: Leaks can occur due to loose or damaged water lines, a malfunctioning water valve, or a cracked reservoir.
    • Solutions: First, turn off the water dispenser and unplug it. Inspect the water lines for any visible damage or loose connections. If you find any, tighten the connections or replace the damaged parts. If the issue persists, it may be a faulty water valve or reservoir, which might require professional repair or replacement.
  2. No Water Flow:
    • Causes: A lack of water flow can be caused by a clogged water filter, a frozen water line, or a malfunctioning water pump.
    • Solutions: Start by checking if the water filter needs replacing. If it’s been a while since you changed it, a clogged filter can impede water flow. If the filter is not the issue, inspect the water line for any ice blockages, especially in the freezer compartment. If neither of these solutions works, it might be a malfunctioning water pump that needs professional attention.
  3. Water Tastes Bad or Has an Odor:
    • Causes: Water with a strange taste or odor can result from a dirty or expired water filter, contaminated water source, or a dirty reservoir.
    • Solutions: Replace the water filter if it’s past its recommended lifespan or if you notice a change in water quality. If the issue persists, it could be related to the quality of your tap water, in which case using a water purifier might be necessary. To address a dirty reservoir, clean it thoroughly following the manufacturer’s instructions.
  4. Water Dispenses at the Wrong Temperature:
    • Causes: If the water dispenser is not delivering water at the desired temperature, it could be due to a faulty thermostat or a malfunctioning heating or cooling element.
    • Solutions: Consult your appliance’s user manual to understand how to adjust the temperature settings. If the settings seem correct but the water temperature is still not right, it may be a thermostat issue or a problem with the heating/cooling elements. In such cases, you should contact a professional technician for repair.
  5. Strange Noises:
    • Causes: Unusual noises such as gurgling, humming, or clicking can be caused by a variety of factors, including trapped air in the lines, a malfunctioning pump, or loose components.
    • Solutions: If the noise is coming from trapped air, try flushing the water lines by dispensing water for a few minutes. If the noise persists, it may be a mechanical issue, and you should seek professional assistance. Loose components can also be tightened to eliminate rattling or clicking noises.
  6. Dispenser Button or Lever Problems:
    • Causes: Over time, the dispenser buttons or levers can become sticky or unresponsive due to dirt and residue buildup.
    • Solutions: Clean the buttons or levers with a mild detergent or a mixture of water and vinegar to remove any dirt or residue. If they are still unresponsive, you may need to replace them, which is generally a straightforward process.

Regular maintenance and timely addressing of these common water dispenser problems can help ensure the longevity and functionality of your appliance. When in doubt or if problems persist, it’s always a good idea to consult the manufacturer’s manual or contact a professional technician for assistance.

Water Dispenser Parts and Spares, Nsairobi Kenya

water-purifier-repair-nairobi-kenya

Water dispensers, whether they are standalone units or integrated into refrigerators, have several essential parts and functions that work together to provide convenient access to clean and refreshing water. Understanding these components can help you troubleshoot issues and maintain your water dispenser effectively. Here are the key parts and their functions:

  1. Water Reservoir:
    • Function: The water reservoir is a storage tank that holds the water to be dispensed. It comes in various sizes, depending on the model, and can be made of plastic or stainless steel. The reservoir ensures a continuous supply of water, even when the water source is temporarily unavailable.
  2. Water Source Connection:
    • Function: This is the point where the water dispenser is connected to the water supply. It typically consists of a water line or hose that carries tap water to the dispenser. A shut-off valve is often included to control the flow of water.
  3. Water Filter:
    • Function: Water filters are essential for improving water quality by removing impurities, sediment, chlorine, and other contaminants. They ensure that the water dispensed is clean, safe to drink, and has a better taste. Filters need periodic replacement to maintain their effectiveness.
  4. Cooling System (Refrigeration Unit):
    • Function: If your water dispenser offers chilled water, it contains a cooling system. This system cools the water in the reservoir to the desired temperature, typically between 35°F and 50°F (1.7°C and 10°C). It consists of a compressor, condenser, evaporator, and a fan to circulate cold air.
  5. Heating Element (Hot Water Dispensers):
    • Function: Hot water dispensers have a heating element that heats the water in the reservoir to provide hot water on demand. The temperature can be adjusted to suit your preferences, typically ranging from 160°F to 200°F (71°C to 93°C).
  6. Dispensing Mechanism (Faucet or Spout):
    • Function: The dispensing mechanism is where you access the water. It can be a simple push-button, lever, or touchpad that activates the flow of water when pressed. Some dispensers also feature child safety locks to prevent accidental hot water dispensing.
  7. Drip Tray:
    • Function: The drip tray collects any spilled or excess water, preventing it from reaching the floor or countertop. It is removable for easy cleaning and maintenance.
  8. Temperature Controls:
    • Function: Temperature controls allow you to adjust the temperature of the water being dispensed, whether it’s cold or hot. These controls are typically located on the front panel or inside the dispenser.
  9. Indicator Lights and Displays:
    • Function: Many modern water dispensers come equipped with indicator lights or digital displays that provide information about the water temperature, filter status, and other important functions. These help you monitor and maintain your dispenser more effectively.
  10. Safety Features:
    • Function: Water dispensers often include safety features like child locks, which prevent hot water from being dispensed accidentally, and leak detection systems to alert you if there is a water leak or malfunction.
  11. Overflow Prevention System:
    • Function: To prevent overflows and water wastage, some water dispensers are equipped with sensors that detect when the reservoir is full and automatically stop water flow.

Understanding these water dispenser parts and their functions can help you identify issues when they arise and perform basic maintenance tasks. Regular cleaning, filter replacement, and occasional servicing by a professional technician can keep your water dispenser working efficiently and providing clean, refreshing water for your needs.

Water Dispenser maintenance services in Westlands

Water dispenser maintenance is essential to ensure that your appliance functions efficiently, delivers clean and refreshing water, and lasts for a long time. Regular maintenance tasks can help prevent common problems and keep your water dispenser in excellent condition. Here’s a comprehensive guide on water dispenser maintenance:

  1. Cleaning:
  • Exterior: Wipe down the exterior of your water dispenser with a damp cloth to remove dust, fingerprints, and spills. Use a mild detergent or a mixture of water and vinegar for stubborn stains. Make sure to dry it thoroughly to prevent water spots.
  • Drip Tray: Remove and clean the drip tray regularly. Wash it with warm, soapy water, and rinse it thoroughly. Empty and clean any accumulated water in the drip tray holder.
  • Water Reservoir: If your water dispenser has a removable water reservoir, clean it periodically with warm, soapy water, and rinse it thoroughly. Ensure it is completely dry before reinserting it.
  • Faucet or Spout: Clean the dispensing mechanism (faucet or spout) by running a mixture of water and vinegar through it. This helps remove mineral deposits and any potential blockages. Rinse thoroughly afterward.
  1. Filter Replacement:
  • If your water dispenser has a water filter, replace it according to the manufacturer’s recommendations. Typically, this is every six months to a year, but it can vary depending on water quality and usage. A clogged or expired filter can lead to poor water quality.
  1. Check for Leaks:
  • Regularly inspect the water dispenser and the surrounding area for any signs of leaks. Leaking water can cause damage to your appliance and the surrounding area. If you detect a leak, address it promptly by tightening connections or seeking professional assistance if necessary.
  1. Sanitizing:
  • To prevent the growth of bacteria and mold, sanitize the water reservoir, drip tray, and internal components periodically. You can use a mixture of water and a mild disinfectant or follow the manufacturer’s recommended sanitization procedure.
  1. Temperature Calibration:
  • Check the temperature settings for hot and cold water and adjust them if needed. Follow the manufacturer’s instructions for calibrating the temperature controls to ensure your water dispenser provides water at the desired temperatures.
  1. Inspection and Maintenance Schedule:
  • Create a regular maintenance schedule to keep track of when cleaning, filter replacement, and other tasks are due. This helps ensure that you don’t forget crucial maintenance steps.
  1. Professional Servicing:
  • If you encounter complex issues or problems that you can’t resolve on your own, such as electrical or mechanical malfunctions, it’s advisable to contact a professional technician. They can diagnose and repair the problem to prevent further damage.
  1. Water Source Maintenance:
  • If your water dispenser is connected to a water line, make sure to maintain the water source as well. Periodically check for any issues with the water supply line and the shut-off valve.

By following these maintenance guidelines, you can keep your water dispenser in optimal working condition, ensure the quality of the water it dispenses, and extend its lifespan. Regular care and attention to your water dispenser will contribute to its reliable performance and your satisfaction with the appliance.

Appliance Repair in Mombasa

Coldrooms Installation & Repairs

Appliance Repair Services in Nairobi and Mombasa, Kenya


Appliance Repair in Mombasa

Mombasa and Nairobi Kenya Appliance Repair For all Brands

Appliance Repair in Mombasa : Mombasa and Nairobi Kenya’s premier appliance repair services for Washing Machine Repair, Cooker Repair, Ovens, Dishwasher Repair, Tumble Dryer Repair, Oven Repair, Fridge, Refrigerator, Air conditioners, cooling systems and cold room installation, repair and maintenance.

Get parts and spares at the best rates in Mombasa and Nairobi Kenya , and Nairobi Kenya. With over 10 years experience in the market, you can never gowrong with us. Looking for Appliance Repair Services “Near Me” ? if you find yourself here, make a point to call 0725414578, inquire about how we can help with your appliance. You sure will be impressed by our assistance. We work Fix residential home appliances, appliances in Hotels, Schools and businesses in Mombasa and Nairobi Counties.

Top Appliance Repair Services in Mombasa and Nairobi Kenya

Mombasa’s premier appliance repair services for Washing Machine Repair, Cooker Repair, Ovens, Dishwasher Repair, Tumble Dryer Repair, Oven Repair, Fridge, Refrigerator, Air conditioners, cooling systems and cold room installation, repair and maintenance. Get parts and spares at the best rates in Mombasa, and Nairobi Kenya.
With over 10 years experience in the market, you can never gowrong with us. Looking for Appliance Repair Services “Near Me“ ? if you find yourself here, make a point to call 0725414578, inquire about how we can help with your appliance. You sure will be impressed by our assistance. We work Fix residential home appliances, appliances in Hotels, Schools and businesses in Mombasa and Nairobi Counties.

Our Facebook Page

1. WASHING MACHINE REPAIR IN Mombasa and Nairobi Kenya

Washing Machine Repair in Mombasa, Washing Machine Parts and spares, Washing Machine installation, Washing Machine Maintenance Services. Repair services for all washer brands including Bosch, Samsung, LG, Whirlpool, Mika, Miele and more, in Mombasa County and Nairobi Kenya

2. FRIDGE REPAIR IN Mombasa and Nairobi Kenya

Refrigerator Repair in Mombasa, Refrigerator Parts and spares, Refrigerator installation, Refrigerator Maintenance Services. Defrosting, Gas Refilling / Refrigerant Recharging, Repair services for all Fridge brands including Bosch, Samsung, LG, Whirlpool, Mika, Miele and more, in Mombasa County and Nairobi Kenya.

3. WATER DISPENSER REPAIR IN Mombasa and Nairobi Kenya

Water Dispenser Repair Services in Mombasa, Water Dispenser parts and spairs, Water dispenser services and maintenance, water dispenser problem diagnosis : Leaking, Smelly water, not heating, not cooling, dispenser refrigerant, dispenser taps and coils replacement in Mombasa Kenya. Call Mombasa Appliances Repair on 0725414579 for the best water dispenser repair and appliance repair services.

4. COOKER REPAIR IN Mombasa and Nairobi Kenya

Cooker Repair and Oven Repair in Mombasa, Microwave Oven Parts and spares, Inbuilt Oven installation, Electric Oven Maintenance Services. Repair services for all Ovens and Cooker brands including Kitchenaid, Bosch, Samsung, LG, Whirlpool, Mika, Miele and more, in Mombasa County and Nairobi Kenya

5. DISHWASHER REPAIR IN Mombasa and Nairobi Kenya

Dishwasher Repair in Mombasa, Dishwasher Parts and spares like motors, valves and sensors, Dishwasher installation, Refrigerator Maintenance Services. Dishwasher Services, Repair services for all Dishwasher brands including Bosch, Samsung, LG, Whirlpool, Mika, Miele and more, in Mombasa County

6. AIR CONDITIONER REPAIR IN Mombasa and Nairobi Kenya

Air Conditioner Repair in Mombasa, Air Conditioner Parts and spares, Inbuilt Air Conditioner installation, Air Conditioner Maintenance Services. Repair services for all Air Conditioner types for homes, hotels, schools, offices, warehouses, stores,  and more, in Mombasa County and Nairobi Kenya

7. COOLING SYSTEMS & REFRIGERATION REPAIR IN Mombasa and Nairobi Kenya

Cooling systems and refrigeration engineers and services in Mombasa. Cold Rooms, Shopping Mall Freezers, and refrigeration. Installation, maintenancee, repairs, parts and spares, accessories in Mombasa Kenya. Call Mombasa Appliances for inquiries and services, get a cooling systems engineer at your service

8. COLDROOM REPAIR IN Mombasa and Nairobi Kenya

Coldroom Installation, Cooldroom Maintenance, Coldroom parts, coldroom repair, coldroom services in Mombasa and Nairobi, Kenya.

9. OVEN REPAIR IN Mombasa and Nairobi Kenya

Oven Repair in Mombasa, Microwave Oven Parts and spares, Inbuilt Oven installation, Electric Oven Maintenance Services. Repair services for all Ovens and Cooker brands including Kitchenaid, Bosch, Samsung, LG, Whirlpool, Mika, Miele and more, in Mombasa County and Nairobi Kenya

Cooker Repair and Oven Repair in Mombasa, Microwave Oven Parts and spares, Inbuilt Oven installation, Electric Oven Maintenance Services. Repair services for all Ovens and Cooker brands including Kitchenaid, Bosch, Samsung, LG, Whirlpool, Mika, Miele and more, in Mombasa County and Nairobi Kenya


CALL US FOR APPLIANCE REPAIR SERVICES IN MOMBASA AND NAIROBI KENYA

Call Mombasa Appliances Repair for Washing Machine Repair, Cooker Repair, Oven Repair, Refrigerator Repair, Dryer Repair, Water Dispenser Repair, Air Conditioner Repair, Cooling Systems, Cold Rooms, Microwave Oven Repair, Dishwasher Repair and more. Have you been looking for the best appliances Repair “Near Me” to get here ? Welcome home. Here, you can find the best appliance repair and maintenance technicians and engineers at your service on call. Dial 0725414578 to Inquire and request about our appliances installation, repair, maintenance and repair services. The Best Appliance Repair Services in Mombasa for all appliance brands and models

Coldrooms Installation & Repairs

Mombasa Appliances Repair Cold Rooms

We need cold rooms to store perishable products, especially food, for a long time. Choosing the right equipment is very important for cold rooms. Mombasa Appliances Repair provides customized cold rooms according to customer requests and needs.

Adjustable dimensions.
Easy installation and assembly.
80 mm – 150 mm panel thickness options.
42 kg/m³ density polyurethane insulation.
Internal and external surface designed in accordance to hygiene standards.
Can be used health and food sector.
Advanced temperature management.
Ecological and sustainable choice.
Walk-In Chiller (Chiller Room) and Walk-In Freezer (Freezer Room) options.

Mombasa Appliances Repair Cold Room Solutions
We are specialists in the design and installation of chiller room and freezer rooms. Our experts are available to guide you through each stage of the process from the initial consultation through to the design and then the final installation. This ensures that the cold room you have specified meets with your expectations and requirements.

Walk-in Freezer – Freezer Room
Frozen products should be stored in freezer room in order to keep them intact for a long time. The temperature of these rooms is generally -18°C. It is called Walk-in Freezer or Freezer Room.

Temperature : -18°C / -20°C

Suitability : Frozen Foods, Meat, Chicken, Fish, Ice Cream etc.

Dimensions : Custom sizes according to customer requests.

Panels : PUR or PIR

Walk-in Chiller – Chiller Room
In order for the products to preserve their freshness for a long time, they should be stored in a chiller room. The temperature of chiller rooms is usually + 2°C. It is called Walk-in Chiller or Chiller Room.

Temperature : +2°C

Suitability : Fruits, Vegetables, Legumes, Milk, Dairy, Fruit Juices etc.

Dimensions : Custom sizes according to customer requests.

Panels : PUR or PIR


Walk-in Blast Freezer – Blast Freezer Room
It is used for shocking to preserve foods for a longer period of time. The temperature of the blast freezer rooms is generally -40°C. It is especially used for perishable foods. Meat, chicken, fish etc. It is called Walk-in Blast Freezer or Blast Freezer Room.

Temperature : -40°C

Suitability : Meat, Chicken, Fish etc.

Dimensions : Custom sizes according to customer requests.

Panels : PUR or PIR

Design & Consultation
At Mombasa Appliances Repair Services, we consider the needs of the customer to be of the highest importance and we aim to provide guidance to customers from the early stages of planning and will continue to work closely with you throughout the design process to make sure you achieve a satisfactory end result. We offer an initial consultation, with design advice, CAD drawings and a full quotation as part of the project package.


Cold Room Refrigeration Units
Produced in conformity with cold room and freezer room conditions.It conforms to European Union norms and manufactured with CE marking.

Cold Room Doors
Door preference is very important for cold rooms. We are here to suggest the most suitable door to you based on customer needs and room features.

Door Types:

• Hinged Cold Room Doors
• Sliding Cold Room Doors
• Service Doors
• Monorail Doors
• Controlled Atmosphere Doors

Our products are produced in conformity with cold room (walk in chiller)and freezer room (walk in freezer) conditions.It conforms to European Union norms and manufactured with CE marking.

Cold Room Panels
Cold room panels are made of 42 kg/m³ (± 2) Polyurethane. They have also a B2 non-flammable standard under TS EN 13501-1. Panels are connected in a puzzle form. Afterwards they can also be demounted. Wall and ceiling cold room panels are produced in different thicknesses (60 mm, 80 mm, 100 mm, 120 mm, 150 mm, 180 mm, 200 mm). They are 100-120 cm wide and can be manufactured according to your instructions optional long. With the purpose of use, wall and ceiling panel steel sheets can be manufactured with Cr-Ni, PVC, Galvanize and Polyester. Cold room panels are smooth, hygienic and are easily cleanable. As they are hygienic, they are commonly used in hospitals, in grocery storehouses and in medicament branches. Panels prevent the heat loss with its individual design and accessories.

* Optionally, It can be produced as camlock cold room panel.


Cold Room Shelves
Ventilation Efficiency Over 85%
Air flow; cooling, heating, dust, bacteria, removal, drying can easily perform tasks such as. It is the most suitable system especially in cold rooms.

Can See All Products
All rack products can be easily observed. Because the light of the environment does not interfere, the light is illuminated.

More Effective in Fire Extinguishing Systems
Existing fire systems in the neighborhood (CO2, springs, etc.) can interfere with the fire more effectively and timely.


Cold Room Accessories
We supply all necessary equipment for cold rooms.

PVC Curtain
Led Lighting Systems
Pressure Compensating Valve
Cold Room Accessories (U,interior,exterior, hygenic and ceiling accessories etc.)
Environmentally Friendly
Certified Products
Does not contain carcinogenic material
Can be used in health and food sector


Heating and Cooling System Basics


Most of us take heating and cooling for granted. We expect our heating systems to keep us warm during the winter, and we depend on air-conditioning to keep us cool during the summer.

When the house is cold in winter or hot in summer, the natural reaction is to call for professional service. Fortunately, there is an alternative. You can cut service costs drastically and keep your heating and cooling systems working efficiently by doing some maintenance and quick fixes yourself. But first, it’s important to know how the basics of how heating and cooling systems function.


How Heating and Cooling Systems Work
All climate-control devices or systems have three basic components: a source of warmed or cooled air, a means of distributing the air to the rooms being heated or cooled, and a control used to regulate the system (e.g., thermostat). The sources of warm air, such as a furnace, and cool air, such as an air conditioner, in a house often use the same distribution and control systems. If your house has central air conditioning, cool air probably flows through the same ducts that heat does and is regulated by the same thermostat. When a heating or cooling system malfunctions, any of these three basic components may be causing the problem.

Both heating and air conditioning work on the principle that heat always moves from a warm object to a cooler one, just as water flows from a higher to a lower level. Furnaces and heaters put heat into the air to make your home warmer; air conditioners remove heat to make your home cooler.

All heating and cooling units burn fuel. Air conditioners use electricity. Most home heating systems use gas or fuel oil; other systems use electricity. The heat pump — an electrically powered climate control unit — both heats and cools air. In summer it extracts heat from the air inside your home. In winter it pulls heat from the air outside and uses this heat to warm the air inside.

When the furnace is turned on, it consumes the fuel that powers it, whether it be gas, oil, or electricity. As fuel is burned, heat is produced and channeled to the living areas of your home through ducts, pipes, or wires and then is blown out of registers, radiators, or heating panels. Older systems use the heat they produce to heat water, which in turn heats the air in your home. These systems use a boiler to store and heat the water supply, which is then circulated as hot water through pipes embedded in the wall, floor, or ceiling.

When an air conditioner is turned on, electrical power is used to cool a gas in a coil to its liquid state. Warm air in your home is cooled by contact with the cooling coil, and this cooled air is channeled to the rooms of your home through ducts and out registers or — in the case of room air conditioners — directly from the unit itself.

In the next section, we’ll review the different distribution systems used for heating and cooling the home.


Heating and Cooling Distribution Systems


Once air is warmed or cooled at the heat/cold source, it must be distributed to the various rooms of your home. This can be accomplished with the forced-air, gravity, or radiant systems explained below.

Forced-Air Systems
A forced-air system distributes the heat produced by the furnace or the coolness produced by a central air conditioner through an electrically powered fan, called a blower, which forces the air through a system of metal ducts to the rooms in your home. As the warm air from the furnace flows into the rooms, colder air in the rooms flows down through another set of ducts, called the cold air return system, to the furnace to be warmed. This system is adjustable: You can increase or decrease the amount of air flowing through your home. Central air conditioning systems use the same forced-air system, including the blower, to distribute cool air to the rooms and to bring warmer air back to be cooled.

Problems with forced-air systems usually involve blower malfunctions. The blower may also be noisy, and it adds the cost of electrical power to the cost of furnace fuel. But because it employs a blower, a forced-air system is an effective way to channel airborne heat or cool air throughout a house.

Gravity Systems
Gravity systems are based on the principle that hot air rises and cold air sinks. Gravity systems, therefore, cannot be used to distribute cool air from an air conditioner. In a gravity system, the furnace is located near or below the floor. The warmed air rises and flows through ducts to registers in the floor throughout the house. If the furnace is located on the main floor of the house, the heat registers are usually positioned high on the walls because the registers must always be higher than the furnace. The warmed air rises toward the ceiling. As the air cools, it sinks, enters the return air ducts, and flows back to the furnace to be reheated.


Another basic distribution system for heating is the radiant system. The heat source is usually hot water, which is heated by the furnace and circulated through pipes embedded in the wall, floor, or ceiling.

Radiant Systems
Radiant systems function by warming the walls, floors, or ceilings of rooms or, more commonly, by warming radiators in the rooms. These objects then warm the air in the room. Some systems use electric heating panels to generate heat, which is radiated into rooms. Like gravity wall heaters, these panels are usually installed in warm climates or where electricity is relatively inexpensive. Radiant systems cannot be used to distribute cool air from an air conditioner.

Radiators and convectors, the most common means of radiant heat distribution in older homes, are used with hot water heating systems. These systems may depend on gravity or on a circulator pump to circulate heated water from the boiler to the radiators or convectors. A system that uses a pump, or circulator, is called a hydronic system.


Modern radiant heating systems are often built into houses constructed on a concrete slab foundation. A network of hot water pipes is laid under the surface of the concrete slab. When the concrete is warmed by the pipes, it warms the air that contacts the floor surface. The slab need not get very hot; it will eventually contact and heat the air throughout the house.

Radiant systems — especially when they depend on gravity — are prone to several problems. The pipes used to distribute the heated water can become clogged with mineral deposits or become slanted at the wrong angle. The boiler in which water is heated at the heat source may also malfunction. Hot water systems are seldom installed in new homes.

In the next section, learn how the thermostat and other controls are used to maintain the indoor climate created by your heating and cooling systems.

Controls for Heating and Cooling Systems
The thermostat, a heat-sensitive switch, is the basic control that regulates the temperature of your home.

It responds to changes in the temperature of the air where it is located and turns the furnace or air conditioner on or off as needed to maintain the temperature at a set level, called the set point. The key component of the thermostat is a bimetallic element that expands or contracts as the temperature increases or decreases in a house.

Older thermostats have two exposed contacts. As the temperature drops, a bimetallic strip bends, making first one electrical contact and then another. The system is fully activated when the second contact closes, turning on the heating system and the anticipator on the thermostat. The anticipator heats the bimetallic element, causing it to bend and break the second electrical contact. The first contact is not yet broken, however, and the heater keeps running until the temperature rises above the setting on the thermostat.

More modern thermostats have coiled bimetallic strip elements, and the contacts are sealed behind glass to protect them from dirt. As the temperature drops, the bimetallic elements start to uncoil. The force exerted by the uncoiling of the elements separates a stationary steel bar from a magnet at the end of the coil. The magnet comes down close to the glass-enclosed contact, pulls up on the contact arm inside the tube, and causes the contacts to close, completing the electrical circuit and turning on the heater and the anticipator. As the air in the room heats up, the coil starts to rewind and breaks the hold of the magnet on the contact arm. The arm drops, breaks the circuit, and turns off the system. As this point, the magnet moves back up to the stationary bar, keeping the contacts open and the heater turned off until the room cools down again.

The latest heat and air-conditioning controls use solid-state electronics for controlling the air temperature. They are typically more accurate and more responsive than older systems. However, repair to solid-state controls usually means replacement.

Understanding how the heating and cooling systems function in your home will help you head off problems before they become too serious.


Cooling Systems & Refrigeration

Cooling Systems & Refrigeration

Cooling Systems & Refrigeration repair, installation, maintenance, parts, technicians and engineers in Mombasa and Nairobi Kenya.

How to Repair Central Air Conditioners & Cooling Systems

Central air conditioners have two separate components: the condenser and the evaporator. The condenser unit is usually located outside the house on a concrete slab. The evaporator coil is mounted in the plenum or main duct junction above the furnace.

Most central air conditioners are connected to a home’s forced-air distribution system. Thus, the same motor, blower, and ductwork used for heating are used to distribute cool air from the air conditioning system. When a central air conditioner is operating, hot air inside the house flows to the furnace through the return-air duct.

The hot air is moved by the blower across the cooled evaporator coil in the plenum and is then delivered through ducts to cool the house. When the air conditioner works but the house doesn’t cool, the problem is probably in the distribution system.

cooling systems engineer refrigeration mombasa nairobi kenya

Both the evaporator and the condenser are sealed. Therefore, a professional service person should be called for almost any maintenance other than routine cleaning. Central air conditioners should be professionally inspected and adjusted before the beginning of every cooling season.

However, don’t let your maintenance end with this annual checkup. While there aren’t many repairs you can make yourself, there are specific maintenance procedures you can follow to keep your system operating at peak efficiency.


Before you start working, let’s try to narrow the scope of the job. Look for the problem you’re having, and its solution, on the chart on the next page.

For more articles on home repair, check out the following links.
How To Repair Room Air Conditioners: Cooling units that you mount in your window have the same job as central air conditioners, but the repair principles are different. Follow these instructions to get your unit running smoothly.

Major Appliance Repair: If the a/c isn’t the only thing in your house on the fritz, you can learn how to fix other machines in this article.
Small Appliance Repair: Once you’ve tackled the a/c, a toaster or blender seems like child’s play. Find out how to fix them here.

Thermostat Maintenance: To make sure there’s actually a problem with your a/c, you may want to check the thermostat, too. Learn how to calibrate a thermostat.


Troubleshooting Central Air Conditioners
Central air conditions will need some professional maintenance, but there are many minor problems that you can easily fix yourself. If your central a/c unit isn’t working properly, look for the problem you’re experiencing on this chart and see if it’s a do-it-yourself job.

CENTRAL AIR CONDITIONER TROUBLESHOOTING CHART

Problem Possible cause Solution
Condenser
doesn’t run

1. No power.

1. Check for blown fuses or tripped
circuit breakers at main entrance
panel or at separate entrance
panel; restore circuit.
2. Thermostat set
too high.
2. Lower thermostat setting 5°.

3. Motor faulty. 3. Call a professional.
4. Compressor
faulty. 4. Call a professional.

Uneven cooling

1. Distribution
system out of
balance. 1. Balance system.

Inadequate
cooling
1. Thermostat set
too high. 1. Lower thermostat setting 5°.

2. Evaporator dirty. 2. Clean evaporator
3. Unit too small.
3. Replace with larger unit;
call a professional.
Unit doesn’t
1. Thermostat set
1. Lower thermostat setting 5°.
cool
too high.
2. Condenser dirty. 2. Clean condenser coil and fins;
if necessary, straighten fins.
3. Condenser unit 3. Remove debris blocking condenser;
blocked.
cut down weeds, grass, and vines.
4. Evaporator dirty. 4. Clean evaporator.
5. Compressor faulty. 5. Call a professional.
6. Not enough
refrigerant in system. 6. Call a professional.

Condenser unit
turns on and
off repeatedly 1. Condenser dirty.
2. Condenser unit
blocked.
1. Clean condenser coil and fins.
2. Remove debris blocking condenser;
cut down weeds, grass, and vines.
3. Evaporator dirty. 3. Clean evaporator.


A dirty evaporator is a common problem. On the next page you’ll learn how to access the evaporator and clean it properly.


Cleaning the Evaporator
The evaporator for the central air system is located directly above the furnace in the plenum. The evaporator may not be accessible, but if it is, you should clean it once a year. If the plenum has foil-wrapped insulation at its front, you can clean the evaporator; if the plenum is a sealed sheet metal box, do not attempt to open it. Here’s how to clean an accessible evaporator:

Step 1: Remove foil-wrapped insulation at front of plenum; it’s probably taped in place. Remove tape carefully, because you’ll have to replace it later. Behind insulation is access plate, which is held in place by several screws. Remove screws and lift off plate.


Step 2: Clean entire underside of evaporator unit with stiff brush. A large hand mirror can help you see what you’re doing. If you can’t reach all the way back to clean entire area, slide evaporator out a little. Evaporator can be slid out even if it has rigid pipes connected to it, but be careful not to bend pipes.

Step 3: Clean tray below evaporator unit. This tray carries condensation away from evaporator. Pour 1 tablespoon of household bleach into weep hole in tray to prevent fungus growth. In extremely humid weather, check condensate drain and pan every other day. If there’s much moisture in pan, weep hole from pan to drain line may be clogged. Open weep hole with piece of wire.

Step 4: Put unit back into place, reinstall plate, and tape insulation back over it.

Step 5: Turn back on air conditioner, and check for air leaks. Seal any leaks with duct tape.

You also may need to clean the condenser to get your air conditioning functioning properly. Find out how on the next page.
Cleaning the Condenser
In most air-conditioning systems, the condenser unit is located outside the house and is prone to accumulate dirt and debris from trees, lawn mowing, and airborne dust. The condenser has a fan that moves air across the condenser coil. You must clean the coil on the intake side, so, before you turn off the power to the air conditioner, check to see which direction the air moves across the coils. Here’s how to clean the condenser:


What You’ll Need
You’ll want to have these tools on hand to clean the condenser:
Grass shears or pruners
Spray bottle of coil cleaner
Soft brush
Fin comb
Carpenter’s level
Pry bar or piece of 2-by-4
Gravel or rocks


Step 2: Clean condenser with commercial coil cleaner, available at refrigerator supply stores. Instructions for use are included. Flush coil clean (do not use hose); let dry.

Step 3: Clean fins with soft brush to remove accumulated dirt. You may have to remove protective grille to reach them. Do not clean fins with garden hose, as water could turn dirt into mud and compact it between fins. Clean fins very carefully: They’re made of light-gauge aluminum and are easily damaged. If fins are bent, straighten them with fin comb, sold at most appliance parts stores. A fin comb is designed to slide into spaces between fins. Use it carefully to avoid damaging fins.

Step 4: Check concrete pad on which condenser rests to make sure it’s level. Set carpenters’ level front to back and side to side on top of unit. If pad has settled, lift pad with pry bar or piece of 2 x 4, then force gravel or rocks under concrete to level it.

During the fall and winter, outside condenser units should be protected from the elements to prevent leaf blockage and ice damage. Cover the condenser unit with a commercial condenser cover made to fit the shape of the unit or use heavy plastic sheeting secured with sturdy cord.

If you’ve cleaned everything you can and you’re still not getting cool air, the problem could be the refrigerant. Learn what to do in that case on the next page.

Handling the Refrigerant
The coolant used in most air conditioning systems is a refrigerant called Freon. If the system does not contain the proper amount of Freon, little or no cooling will take place. If you suspect a Freon problem, call a professional service person to recharge the system. Caution: Do not try to charge your system’s refrigerant lines.

Here’s how you can repair the system’s coolant lines. Examine the lines running from the condenser outside the evaporator inside the house. If the insulation is damaged or worn, it will cut down on the cooling efficiency of the unit and, therefore, should be replaced.

Replace damaged or worn coolant line insulation with new insulation of the same type as soon as possible. Follow manufacturer’s instructions for installation.

Now that you know when you do and don’t need to call for professional help, you’ll be able to make some repairs on your own. Using the tips in this article, you’ll be able to get save a few bucks and get the cool air pumping sooner.

For more articles on home repair, check out the following links.
How To Repair Room Air Conditioners: Cooling units that you mount in your window have the same job as central air conditioners, but the repair principles are different. Follow these instructions to get your unit running smoothly.
Major Appliance Repair: If the a/c isn’t the only thing in your house on the fritz, you can learn how to fix other machines in this article.
Small Appliance Repair
Thermostat Maintenance: To make sure there’s actually a problem with your a/c, you may want to check the thermostat, too. Learn how to calibrate a thermostat.


Air Conditioner Installation & Repair


Air Conditioner Installation & Repair

Air Conditioner repair services, air conditioner maintenance and spare parts inMombasa and Nairobi – Kenya.

5 Reasons Why Your Air Conditioner Stopped Working

Mechanical Issues

An air conditioner’s job is to get rid of the heat inside your home and bring in cool air, with the help of a chemical called refrigerant. AC systems have basically five components:

Fan
Evaporator coil (cools the air)
Compressor (electric pump)
Condenser coil (transfers heat)
Expansion device
Air conditioning units have two parts: one inside your home and one outside of it. A fan in the inside unit blows air through the chilled evaporator coil, cooling your house, via air ducts. Meanwhile outside, the compressor, condenser coil and another fan vent the hot air coming off the refrigerant. The expansion valve regulates the amount of refrigerant moving between the evaporator and condenser coils.

Any of these components can experience mechanical failure. If the motor on your fan is not working, the outdoor unit can’t get rid of the heat. If your compressor is damaged, the refrigerant can’t circulate between the inside and outside units [source: Coolray].

Replacing some of these parts is very expensive (particularly the compressor) and may not be much cheaper than replacing the whole unit. Having a trained technician give your unit a yearly checkup should prevent premature mechanical failure.

“Residential central air conditioning units are extremely reliable, which is why homeowners often forget to perform routine maintenance on them,” says Francis Dietz, vice president for public affairs for the Air Conditioning, Heating and Refrigeration Institute, says in an email. Nevertheless, these units “require attention for them to perform properly.”

4: Clogged Air Filter


Dietz says failure to replace the air filter on schedule is one of the most common reasons that an AC unit will stop working. “Homeowners who ignore this basic task, risk at the very least make their unit work harder than necessary just to try and push the cooled air through a clogged filter,” he notes.

“In extreme – but not completely uncommon – cases, a unit can be completely incapacitated and have to be replaced because the cool air, having nowhere to go, circulates back into the evaporator coil, causing it to freeze and fail,” he adds. The evaporator coil is a network of tubes, filled with a coolant called refrigerant, that remove moisture and heat from the air.

A clogged filter hinders the flow of air through the unit, reducing its efficiency and making it tougher to cool your house. Consumer Reports recommends that filters on central air conditioning units be changed once a month, especially if you have the air conditioning running constantly, or have pets who shed fur.

To make it easier, Dietz says, many of today’s advanced thermostats automatically notify homeowners of the need to replace a filter.

3: Low Refrigerant

Inside your warm house, cold liquid refrigerant evaporates on the evaporator coil, turning into gas. The hot refrigerant gas is then pumped outside into your system’s condenser, where it transfers the heat to the outside air and reverts into a liquid again and the cycle continues [source: DOE].

As you can imagine, if the refrigerant is low, the air conditioner won’t cool very well. The amount of the refrigerant in the unit must exactly match the manufacturer’s specifications

There are two reasons why you would have a low level of refrigerant. One is that when the system was installed, not enough was added. But more likely, the level is low because your system has developed a leak.

Leaks are the cause of 90 percent of the cases of low refrigerant [source: ServiceExperts]. So, simply adding more refrigerant isn’t going to fix things. Bring in a trained technician to find the leak and fix it. After the repair is tested, the technician can charge the system with the correct amount of refrigerant and your system should be set.

Nearly all current AC systems use halogenated chlorofluorocarbons (HCFCs), aka R-22 or freon, as a refrigerant but these are being phased out for environmental reasons. Between 2020 and 2030, ozone-safe hydrofluorocarbons (HFCs) are expected to become the norm

2: The Outdoor Condenser Unit is Blocked

Careless outdoor landscaping and/or neglect of lawn care may be another reason that your house is so hot.

“Shrubs and other plant life can obstruct airflow to the [outdoor condenser unit], which relies on it for proper operation,” says Dietz of the Air Conditioning, Heating and Refrigeration Institute.

If the condenser coil is covered with dirt or leaves, the heat transfer is impeded and the unit has to work a lot harder to do any cooling, leading to possible system failure [source: Rosone].

“Homeowners should take care to ensure a decent-sized berth around and on top of their outdoor unit and also periodically use a garden hose (not a pressure washer), to remove dirt and debris that might be caught in the unit’s fins,” says Dietz. “Lawn clippings and dirt kicked up by heavy rainfall are common culprits here.”

Consumer Reports recommends allowing 2 to 3 feet (60 to 91 centimeters) of space between the unit and any plants or backyard structures, and 5 feet (1.5 meters) between the top of the unit and any trees that hang over it.

1: The Unit Is Too Small or Has an Old Thermostat

One big reason for malfunctions is that a lot of home air conditioning systems aren’t installed correctly in the first place, says Todd Washam, director of industry and external relations for the Air Conditioning Contractors of America, a trade group that represents about 4,000 contractors across the U.S. and writes standards and manuals for the industry.

Washam says that it’s crucial for installers to make careful calculations beforehand on how much cooling a home will need, and to make sure that the air conditioning unit is matched with properly-sized ducts. If the ducts are too small, he says, the unit will have to work harder to cool down the house. That, in turn, increases wear and tear on the components and shortens their lifespan. And if the unit itself is too small for the space, the house will never get cool enough.

Another problem can arise if your thermostat isn’t correctly calibrated, particularly common if you have the old-school dial control version. If something is wrong with your thermostat, your air conditioner won’t get the necessary instructions on how much to cool your house. Remedy the problem by either having the thermostat recalibrated by a technician, or replacing it with a newer programmable digital unit, which will be more precise and help you to save energy as well. Some of the new devices can even be programmed remotely using your smartphone or tablet, which is a nice convenience.

Lots More Information


How To Repair Room Air Conditioners

Room air conditioners, also called window units, work the same way central air conditioners do. They are smaller than central systems and often more expensive to operate. Depending on its size, a room unit may cool only the room in which it’s located, or it may be able to cool adjoining rooms as well.

Sandwiched between the coils are a compressor, two fans, a motor, and thermostat controls. Dirt is the biggest enemy of window air conditioners; it can lower the efficiency of the evaporator coil, block the operation of the fan that blows out the cool air, clog filters, and block drain ports.

The coils, the compressor, and the motor of a room air conditioner are sealed components, so any repairs to them should be left to a professional service person. However, you can make minor repairs, and regular maintenance will keep your unit running well. When extensive repairs are needed, you can also save the cost of a service call by removing the air conditioner from its mounting and taking it to the repair shop.

During the winter, room air conditioners should be protected from the elements. Either remove the unit from its mounting and store it or cover the outside portion of the unit with a commercial room air conditioner cover or with heavy plastic sheeting, held in place with duct tape.

Caution: Before doing any work on a room air conditioner, make sure it’s unplugged. Room air conditioners have either one or two capacitors, located behind the control panel and near the fan. Capacitors store electricity, even when the power to the unit is turned off. Before you do any work on an air conditioner, unplug it and discharge the capacitor or you could receive a severe shock. The unit’s owner’s manual will show the location of capacitors and tell how to discharge them. Otherwise, let an air conditioning technician do it.

Now that you’re ready to work on your air conditioner, try to determine exactly what needs to be done. Look for your problem, and solution, on the chart on the next page.

ROOM AIR CONDITIONER TROUBLESHOOTING CHART
Problem Possible cause Solution
Unit doesn’t run

1. No power.

1. Check cord, plug, and outlet.
Check for blown fuse or tripped
circuit breaker at main entrance
panel; restore circuit.
2. Motor overload
or safety shutoff. 2. Wait 30 minutes; press reset
button. Repeat if necessary.
3. Switch faulty.

3. Check terminals and insulation; if
burns are evident, replace switch. If
switch looks all right, call a professional.
Fuses blow 1. Circuit overloaded. 1. Put on different circuit.
2. Voltage low.
2. Call a professional or the
power company.
Cooling
inadequate 1. Thermostat set
too high. 1. Lower thermostat setting 5°.

2. Filter dirty. 2. Clean or replace filter.
3. Coils dirty. 3. Clean coils.
4. Condenser blocked
from outside. 4. Make sure outside of unit
is not blocked.
5. Motor faulty. 5. Call a professional.
6. Compressor faulty. 6. Call a professional.
7. Coolant leak. 7. Call a professional.
Fan runs, but
unit doesn’t cool 1. Thermostat set
too high. 1. Lower thermostat setting 5°.

2. Thermostat faulty.
2. Test thermostat; if faulty,
replace, or call a professional.
3. Coils dirty. 3. Clean coils.
4. Motor faulty. 4. Call a professional.
5. Compressor
faulty.
5. Call a professional.
Unit cools, but
fan doesn’t run 1. Control switch
set wrong. 1. Reset switch; try different settings.

2. Fan clogged. 2. Clean and tighten fan blades.
3. Fan blades bent. 3. Straighten fan blades.
4. Fan motor faulty.
4. Replace fan motor or
call a professional.
Unit turns on
and off repeatedly 1. Coils dirty.
1. Clean coils.

2. Filter dirty. 2. Clean or replace filter.

As you can see, there are many parts that can fall into disrepair on an air conditioner. You can learn how to fix many of these, such as the filter and coils, on the next page.


Filter, Power Cord, Coils, Switch, Drain Ports, Motor and Compressor
The filter, power cord, coils, switch, thermostat, drain ports, and fan are important to service on a routine basis to avoid larger problems. Below are guidelines on how to maintain these key parts.

Filter

At the beginning of every cooling season and once a month during the season, remove the front grille and clean or replace the filter. If you live in a very dusty area, clean or replace the filter more often. Most room air conditioners have a washable filter that looks like sponge rubber.

Clean the filter with a solution of mild household detergent and water; rinse well. Let the filter dry completely before reinstalling it. Some units have a throwaway filter, similar to a furnace filter. When this type of filter becomes dirty, replace it with a new one of the same type.

Power Cord

The power cord that connects the air conditioner to the wall outlet may become worn and fail to supply electricity to the unit. To check the cord, remove the control panel. Unscrew the cord terminals and then attach a test wire across the bare lead wires.

Hook the clips of a volt-ohm-milliammeter (VOM) set to the RX1 scale to the prongs of the cord’s plug. If the meter reads zero, the cord is functioning. If the meter reads higher than zero, replace the cord.

Evaporator and Condenser Coils

Clean the evaporator and condenser coils at the beginning of the cooling season and every month during the season. If you live in a very dusty area, clean the coils more often. Use a vacuum cleaner on these components.

If the fins on the coils are bent, straighten them with a fin comb, sold at most appliance parts outlets. A fin comb is designed to slide into the spaces between the fins. Use it carefully as the fins are made of light-gauge aluminum and are easily damaged.

Switch

The selector switch, located directly behind the control panel, turns the unit on. If the air conditioner does not run at any setting, and it is receiving power, chances are the switch is faulty. To correct the problem, remove the control panel and locate the switch. Check the switch terminals for burnt insulation or burn marks on the terminals. If you see any indication of burning, replace the switch with a new one of the same type.

The switch is held to the control panel or frame with screws; unscrew it and connect the new one the same way. If you determine the problem may not be the switch, call a professional service person.

Drain Ports

As the air conditioner operates, condensed moisture and water vapor from the evaporator coil are funneled through drain ports or an opening between the partition in the middle of the evaporator coil and the condenser coil. At this point, the fan blows the moisture against the condenser coil, where the water is dissipated.

Drain ports can become clogged with dirt. The result is water leaking from the appliance, usually through the bottom of the grille. To prevent clogging, clean the ports with a short piece of wire hanger or the blade of a pocketknife. Do this at the beginning of every cooling season and every month during the season. Also check the condenser side of the air conditioner. Some models have a drain port along the bottom edge of the cabinet frame. If your air conditioner has this drain port, clean it out when you clean the other ports.

Motor and Compressor

If problems occur in the motor or compressor of the air conditioner, call a professional service person.

The problem may not be in the mechanics of your unit at all; it may be the thermostat. Find out how to check and replace a thermostat on the next page.


How To Test and Replace a Thermostat

The thermostat is located behind the control panel. Here’s how to test and/or replace the thermostat:

Step 1: Remove grille and control panel from unit. Thermostat has special sensing bulb attached to it; this part extends from thermostat into evaporator coil area. Its role is to sense temperature, which is controlled by thermostat.

Step 2: Remove thermostat carefully because you must return sensing bulb to identical spot later. To make replacement easier, tag location of bulb before you remove thermostat.

Step 3: Check thermostat with VOM set to RX1 scale. Clip probes of tester to thermostat terminals, and turn temperature control dial to coldest setting. If meter reads zero, thermostat is functioning properly. If reading is higher than zero, replace thermostat with new one of same type. If thermostat is held to control panel or frame with screws, clips, or metal tabs, connect new thermostat the same way the old one was connected.

Note: If the thermostat has more than two lead wires connected to it (not counting the sensing bulb wire) do not try to test or replace it. Instead, call a professional service person.

The fan in your air conditioner also needs routine maintenance. Learn how to keep it running smoothly on the next page.

How To Repair a Room Air Conditioner Fan
When a fan malfunctions, the problem is usually loose or dirty blades. If the fan won’t operate or if it’s noisy, cleaning and tightening will usually fix it. Here’s how to repair a room air conditioner’s fan:
Step 1: Open cabinet and locate fan.

Step 2: Clean away any debris with vacuum and soft cloth.

Step 3: Check fan blade on motor shaft for looseness. Blade is fastened to shaft with setscrew at hub of blade.

Tighten setscrew with screwdriver or Allen wrench. If air conditioner has round vent fan, tighten fan on motor shaft by inserting long-blade screwdriver through port in fan.

Fan is installed in its housing with bolts, and vibration can loosen these fasteners. Then tighten them with wrench.

Step 4: If fan has oil ports, apply several drops of 20-weight nondetergent motor oil (not all-purpose oil) to each port at beginning of cooling season.
Step 5: If you suspect fan motor is faulty, test it with VOM set to RX1 scale. Disconnect terminal wires from terminals, and clip probes of VOM to wires.

If meter reads between about 3 and 30 ohms, motor is functioning properly. If meter reads either zero or an extremely high number, replace motor.

To remove the fan motor, remove the fan, the power wires, and several mounting bolts. Install the new motor with the reverse procedure. However, if the condenser coil must be moved to get the fan out, do not try to remove the motor. Call a professional service person.

By following the routine maintenance mentioned in this article, you will be able to handle most problems that occur with your window air conditioning unit.


Dishwasher Repair

Dishwasher Repair in Mombasa

Dishwasher Repair in Mombasa – The control panels on the latest dishwashers can look intimidating. They’re loaded with so many dials, push buttons, and other features that the machine looks too complex to repair. This is actually not the case.

With the exception of the control panel, dishwashers haven’t changed much in basic design over the last two decades. You can repair most dishwasher malfunctions yourself, and we’ll discuss tips for do-it-yourself service and maintenance in this article.

Dishwasher parts can be replaced as a unit, which is often easier and less expensive than having a professional service person make repairs. If you aren’t sure a part is still usable, remove it from the dishwasher and take it to a professional for testing. You can then decide whether to buy a new part or have the old one repaired on the basis of the repair estimate.

­Dishwashers usually run on 115-volt or 120-volt power. The water they use comes directly from the water heater, and wastewater is drained into the sink’s drainpipe. The dishwasher is not connected to the cold-water supply.

For best dishwashing results, set the temperature control of the water heater to no less than 140 degrees Farenheit. Water cooler than this usually doesn’t get the dishes clean, unless your dishwasher is a newer model that preheats incoming water. The water shutoff for the dishwasher is typically located below the adjoining sink.

Caution: Because the dishwasher is connected to both the plumbing system and the electrical system, you must consider both systems when working on this appliance.

Before doing any work on the dishwasher, make sure the unit is unplugged or the power to the unit is turned off, and remove the fuse or trip the circuit breaker that controls the circuit at the main entrance panel or at a separate panel. Shut off the water supply to the dishwasher at the shutoff in the basement or crawl space under the kitchen.

Here are some operating checks you can make if the dishwasher does not work:

Step 1: Check to make sure it’s receiving power. If the unit plugs into a wall outlet, check the cord, the plug, and the outlet to make sure they’re functioning properly. Also check the switch that controls the outlet to make sure it’s turned on. Most built-in dishwashers are wired directly into a circuit.

Check the main entrance panel for a blown fuse or tripped circuit breaker, and restore the circuit. If your home is an older one, the dishwasher may be wired to a separate entrance panel; look for a blown fuse or breaker at this panel, and restore the circuit.

Step 2: If the circuit is receiving power, and the wall outlet is controlled by a switch, the switch may be faulty. Test the switch with a voltage tester.

Take off the switch cover plate and place one probe of the tester on one terminal and the other probe on the other terminal. If the tester bulb lights, the switch is functioning. If it doesn’t light, the switch is faulty. Replace the switch with a new one of the same type.

Step 3: Make sure the door is tightly closed and latched. The dishwasher will not operate until the latch is properly engaged. To check the latch, close and latch the door, holding the latch tightly in place. Then, still pressing the latch closed, turn the control knob to the ON position. If the dishwasher works, the latch is faulty and should be cleaned, tightened, or replaced.

Step 4: Make sure the water is turned on and the water temperature is high enough. A breakdown in the water heater could stop flow of water to the dishwasher. Test the hot water in the kitchen sink or bathroom. If you can draw hot water, the water heater may not be at fault.

Step 5: Make sure the controls on the control panel are properly set. The newer push-button controls can be very sensitive; make sure the buttons are firmly pressed into position.

If you’ve gone through these five checks without finding the solution, it’s time to dig deeper into the dishwasher.


Disassembling the Dishwasher

Access to the working parts of most dishwashers is through the front door of the unit. Many repairs can be made to the machine by simply opening the door and reaching into the various component parts, such as the sprayers, strainers, float switch, racks, and door latch.

To get to the control panel on the door, remove a series of retaining screws around the panel. These screws may be under molding trim strips, which usually snap onto the metal housing. Pry off the strips with a stiff-bladed putty knife or a screwdriver, or remove a setscrew that holds the molding. The control knobs are friction-fit on shafts or are held by small setscrews in the base of the knobs. In some dishwashers, the entire front door panel must be removed to gain access to the control components. This panel is held to the door by a series of retaining screws, usually found around the edge on the inside back of the door.

On many models, once the control panel is removed the door panel can be removed by unscrewing a series of fasteners holding the door panel in place. Sometimes these retaining screws are covered by trim moldings, which must be pried or slipped off. For access to the motor, pump, hoses, inlet valves, and other parts, remove the lower access panel. This can usually be done without removing the entire door. The panel may be held by retaining screws, or it may lift up and off metal hangers.

If the dishwasher is portable, tip the machine over on its back or side before removing the control door or lower access panels. This may give you a more comfortable working position.

Once you can get inside the dishwasher, knowing the major parts and how they function will help you assess the problem. We’ll review the main parts and how to check them in the next section.


Door and Switch Repairs

When your dishwasher isn’t working properly, you should check several main components, such as the door gasket, door latch, switches, and timer.

Replacing the Door Gasket
If water leaks through the dishwasher door, the gasket is probably faulty. Open the door and examine the gasket. It should be soft and resilient. If it’s worn, cracked, or hard, it should be replaced.

Once the gasket is in place, check it for fit against the door frame. It should fit tightly with no cracks or bulges between the gasket and the frame. If necessary, tighten or loosen the retaining screws, or refit the gasket in the clips or the door channel. Then run the machine through a washing sequence and check for leaks.

If you spot a leak, and the gasket seems to be properly in place, try adjusting the door latch. The trick is to position the gasket against the frame of the door without flattening the gasket or squeezing it too flat when the door is latched properly. Adjust the latch or the gasket until it fits snugly against the door frame.

Servicing the Door Latch
The latch on a dishwasher door is opened and closed repeatedly, and this hard use can lead to mechanical problems. The latch may be loose, or it may have slipped out of position, throwing the alignment off and preventing the door from closing properly. When this happens, the latch does not engage properly, and the dishwasher will not start.

In many cases, you may be able to solve the problem by adjusting the position of the latch. Move the latch slightly by loosening the screws that hold it. Slide the latch with your fingers or pliers; the screw slots are made especially for this purpose. Close and open the door to see whether the latch is properly aligned. Tighten the screws to hold it in the correct position.

After repositioning the latch, check to see if it’s working properly. Close and latch the door and turn the control knob to the ON position. If the dishwasher doesn’t start, the latch is faulty. Replace it with a new latch, connecting it the same way the old one was connected. You may have to move the new latch back and forth several times before it works properly.

Servicing the Door Switch
On many dishwashers, the latch engages a switch to activate the timer and other control components. If the latch is not completely engaged or if the switch is faulty, the machine will not operate. Here’s how to test and repair a door switch:

Step 1: Latch the door and hold the latch tightly in the closed position. This works best on a unit with a lever-type latch. Then turn the control to the ON position. If the unit works, the problem is probably a misaligned lock unit. Adjust the lock unit with a screwdriver. If this doesn’t solve the problem, the switch may be faulty.

Step 2: Test the switch with a volt-ohm-milliammeter (VOM) set to the RX1 scale. Remove the panel covering the door switch and remove one of the electrical lead wires of the switch from its terminals. Clip one probe of the VOM to each switch terminal and shut the dishwasher’s door. If the meter reads zero, the switch is working. If the meter reads higher than zero, the switch is faulty and should be replaced.

Step 3: Replace the switch with a new one of the same type. Connect the new switch the same way the old one was connected.

Servicing the Float Switch
Dishwashers are usually protected from overfilling by a float switch. This switch is located in the bottom of the unit. Here’s how to check and replace it:

Step 1: Open the door and remove the bottom dish rack. Check to see if the float valve is stuck. If it is, clean away food debris around the float. With a screwdriver handle, lightly tap the top of the float to free it.

Step 2: If tapping doesn’t work, remove the lower access panel and locate the bottom portion of the float and float switch. Test the float switch with a VOM set to the RX1 scale. Unscrew one electrical lead wire to the switch terminal, and clip one probe of the VOM to each terminal. If the meter reads zero, the switch is not faulty. The trouble is probably in the timer. If the meter reads higher than zero, the switch is faulty.

Step 3: Replace the switch with a new one made to fit the dishwasher. The switch is held to a mounting bracket with screws; remove the screws to get the old switch out.

Step 4: Connect the new switch the same way the old one was connected.

Servicing Timer and Control Switches
Because the timer controls many operations, a faulty timer can cause many problems. The timer is a complex component, so you shouldn’t attempt a do-it-yourself repair. Test the timer with a VOM set to the RX1 scale. To gain access to the timer, remove the front control panel. The timer is directly behind the main timer control knob. Disconnect one of the timer’s terminal wires and clip one probe of the VOM to each terminal. If the meter reads zero, the timer is working. If the meter reads higher than zero, the timer is faulty and should be replaced.

If possible, use the same procedure to test the selector and cycle switches. The wiring hookup, however, may be too complicated to figure out on either of these switches. If you aren’t sure you can deal with these switches, call a professional service person. Replace a faulty timer — or a faulty control switch — with a new one made for the dishwasher.

The timer is connected to several wires that supply power to operate the various functions of the dishwasher. To replace the timer, have a helper hold the new timer next to the old one. Connect the wires of the new timer one by one, removing the old wire and connecting the new, to make sure you connect the wires correctly. The wires may be friction-fit on the terminals. If they are, use long-nosed pliers to remove the wires. Don’t pull up on the wires, or you may break the connection between the wires and the clips.

After connecting the wires, set the new timer in position, secure it the way the old one was secured, and replace the control panel and knobs.

If your dishwasher won’t fill with water properly or isn’t drying the dishes, you most likely have a valve or heating element problem. In the next section, we’ll discuss how you can assess these types of problems.

Valve, Dispenser, and Dish Rack Repairs
Checking on and routinely maintaining the various valves, detergent dispenser, and dish rack can keep the right amount of water and cleaner working effectively in your dishwasher.

Servicing the Water Inlet Valve
The water inlet valve controls the amount of water flowing into the dishwasher. It may be activated by the timer or by a solenoid. If the dishwasher doesn’t fill with water:

Step 1: Make sure that the water supply to the unit is turned on and that there’s no problem at the water heater. A shutdown of the water heater would cause a shutdown of the water to the dishwasher.

Step 2: Check the timer to make sure it’s working through its programmed sequences. If both the water supply and the timer are in working order, the problem is probably in the inlet valve.

Step 3: Check the inlet valve located under the tub of the dishwasher. Malfunctions of the inlet valve may also occur when a screen inside the valve becomes clogged with mineral deposits. To solve this problem, pry out the screen with a screwdriver and flush it thoroughly with running water. Then replace the screens.

Step 4: If the valve is controlled by a solenoid, the solenoid is usually connected to the side of the dishwasher. Tap the solenoid and the valve lightly with the handle of a screwdriver to break it free of any obstruction. Then start the dishwasher again.

Step 5: If the dishwasher still doesn’t fill, test the solenoid with a volt-ohm-milliammeter (VOM) set to the RX1 scale. Disconnect one electrical lead to the solenoid and clip one probe of the VOM to each solenoid terminal. If the meter reads from about 100 ohms to 1,000 ohms, the solenoid is functioning. If the reading is higher than 1,000, the solenoid is faulty and should be replaced.

Step 6: If necessary, replace the solenoid with a new one of the same size and type. Connect the new solenoid the same way the old one was connected.

Badly worn or misshapen inlet valves cannot be repaired. If the valve is damaged, replace it with a new one made for the dishwasher. The valve is usually held to a mounting bracket with screws. Take apart the connection linking the valve to the water supply. Then take out screws and remove the valve. Install the new valve by making the connections in reverse order.

Servicing Drain Valves
Some dishwashers have drain valves. These valves are used only in dishwashers with nonreversible motors. When the drain valve malfunctions, call a professional service person.

Servicing the Heating Element
The heating element is used to help dry the dishes. In most dishwashers, the heating element fits around the screen in the bottom of the tub housing; it looks like an electric oven element. The heating element doesn’t malfunction often, but it can burn out. If you suspect a faulty element:

Step 1: Test it with a VOM set to the RX1 scale. Remove the dishwasher’s bottom access panel and disconnect one of the power leads to the element. Clip one probe of the VOM to each element terminal. If the meter reads between 15 and 30 ohms, the element is working. If the reading is higher than 30 ohms, the element is faulty and should be replaced.

Step 2: As needed, replace the heating element with a new one made for the dishwasher. Disconnect the electrical leads to the element’s terminal screws and remove the nuts or other fasteners that hold the element to the terminals. From inside the tub, lift the element out. It may be held by clips and ceramic blocks in the tub, but you can easily thread it past these spacers. Set the new heating element in position, reconnect the power leads, and replace the fasteners that hold the element in place.

Servicing the Detergent Dispenser
Accumulated detergent from prior washings can cause problems with the soap dispenser. Buildup can get into the soap dispenser and interfere with the spring that triggers the flip-out tray, or it can slow down the pivot action of the tray. If the dispenser is not opening, first make sure you aren’t loading the machine so dishes or pots and pans are touching the dispenser, and that dish racks aren’t blocking the dispenser. Also check to make sure the dispenser tray isn’t cracked. If leftover detergent in the tray is almost liquid, rather than just damp, the tray may be damaged.

If you can’t solve the problem easily, replace the entire dispenser unit. This is usually easier than trying to disassemble it and replace separate parts. Use a new dispenser made for the dishwasher. The screws holding the dispenser in place may be on the front of the unit, or you may have to remove the front door panel to get to the screws and make the replacement. Remove the old dispenser and secure the new one, connecting it in the same way the old unit was attached.Troubleshooting Dish Racks

Problems with the dish racks usually occur because the racks have been jammed back into the tub housing after they’re fully loaded. Careless handling can exert enough force to crack or break the roller wheels or throw the racks off the tracks. The solution is easy: Stop jamming the racks.

The repair is easy, too. Remove the racks by pulling out the tiny metal pins that hold them in the tracks. Or simply lift up on the racks and pull them out of the tracks. Then reinstall the racks on the tracks so that they roll smoothly. If the rollers are cracked or broken, replace them with new ones of the same type. The rollers may be friction-fit to their hubs. Pull them off for replacement. Or, if they are held by tiny spring clips, pull the clips out with pliers, or pry them out with the tip of a screwdriver. If you can’t pull the rollers off for replacement, remove and replace the entire rack.

A noisy wash cycle or water that won’t drain are problems that, for the most part, can be handled yourself. We’ll discuss how you can pinpoint these water-related problems in the next section.

Motor and Water-Related Repairs

Keeping the dishwasher’s sprayer arms, strainers, and water pump clean will help deter problems before they begin. Here’s how to check on these important features.

Cleaning Sprayer Arms
The sprayer arms seldom cause any trouble, but sometimes the spray holes in the arms become encrusted with detergent or minerals. When this happens, the holes must be cleaned out so that the arms will work efficiently. Remove the lower arm by twisting off the cap that holds it to the motor shaft. Wash it thoroughly with water and mild household detergent. Sharpen a lead pencil and break off the lead point. Use the tapered end of the pencil to ream out the holes. A wood manicure stick can also be used.

Do not use toothpicks, matches, or metal objects for this job. Lightweight wooden sticks could break off in the ports, causing blockage; metal could scrape and enlarge the ports. After cleaning, place the sprayer arm back on the motor shaft and twist the cap back on to hold it in place. Follow the same procedure to clean the upper sprayer arm.

Removing and Cleaning the Strainer
The strainer is located directly under the lower sprayer arm. When the strainer becomes clogged with food and detergent debris, the dishwasher may flood or overfill. On some dishwashers, the strainer is a plastic or metal component consisting of two semicircular halves. To remove this type of strainer, pry it up. On other dishwashers, the strainer is a one-piece component. To remove this type, remove the cap that holds the sprayer arm on its shaft. Then remove the sprayer arm and the strainer.

Wash the strainer in the kitchen sink with water and a mild household detergent. Use a fairly stiff brush to get all the debris out of the holes and slots in the strainer. Rinse the strainer well and replace it. If part of the strainer lifts out for regular cleaning, check it and clean it — if necessary — after each load of dishes is washed.

Troubleshooting Leaks
If the dishwasher leaks, and you know the problem is not related to tub overfilling, the pump, or inlet valve problems, the plumbing connections may be faulty. Most dishwashers are connected to the water supply with metal pipe fittings, and the leak could be at these fittings. If the fittings are threaded, tighten them with an adjustable wrench. If this doesn’t work, chances are the threads are stripped or the fitting is cracked or otherwise damaged. In this case, replace the fitting.

Most dishwashers discharge used water through a pipe or a hose connected to the drain or garbage disposer under the kitchen sink. If the drain line is made of flexible hosing, it may have cracked from prolonged exposure to hot water. Examine the hose; if it’s damaged, replace it. If the hose is leaking at its connections with the disposer or dishwasher, tighten the fittings or clamps at the connections, or replace the clamps. Also check for water leaks around inlet valves, drain valves, and anywhere you see flexible hoses and hose connections. Leaks at clamps can be stopped by tightening or replacing the clamps. Leaks in hoses can be eliminated by replacing the hoses.


Servicing the Water Pump


In most dishwashers, the water pump is located under the lower sprayer arm. This component pumps the water through the dishwasher. The pump has two impellers, top and bottom. These, as well as other components, can become clogged with food or detergent. Here’s how to disassemble the pump:

Step 1: Remove the cap that holds the sprayer arm on.

Step 2: Remove the sprayer arm, the screen, the pump housing, a bolt, the upper impeller, the food disposer blade, a spacer plate, the impeller hood, a flat plate, an O-ring, and the lower impeller. Lay the parts out in order as you disassemble them so that you’ll be able to reassemble them properly.

Step 3: Clean the parts thoroughly with a mild detergent solution. If any parts are worn, replace them with new ones made for the dishwasher.

Step 4: Replace any seals, such as the O-ring or other washers, with new ones.

Step 5: Reassemble the pump, keeping the parts in order.

To reach the water pump, remove the sprayer arm and screen and then the pump housing. Remove the bolt, and the pump components can be disassembled.

On some dishwashers, the lower impeller serves as a drain pump. This type of system usually has a reversible motor; machines with nonreversible motors have drain valves, as detailed previously. If your machine possesses this impeller pump system, and the water will not drain from the dishwasher, clean the lower pump impeller. This may solve the problem. Otherwise, call a professional service person.

Repairing the Motor
If the dishwasher motor malfunctions, don’t try to fix it yourself. Call a professional service person to make repairs or replace the motor. Before you call for service, however, you should check to make sure that the timer is working and that the dishwasher is receiving power.

Don’t let water leaks, a noisy cycle, soap spots, or other problems keep you from using your dishwasher. Most problems can be handled yourself if you follow the guidelines mentioned in this article.


Fridge & Refrigerator Repair

Fridge & Refrigerator Repair in Mombasa

Fridge & Refrigerator Repair : A refrigerator is one of the few appliances in your home that runs continuously, day or night, keeping your food cold. If you consider how hard a refrigerator has to work, it is actually quite amazing that they break down so infrequently.

On the rare occasion your refrigerator does stop working, you may face a high repair bill and the expense of replacing all your lost food. Have no fear! This article is here to tell you everything you need to know about repairing your refrigerator and freezer yourself.

You might be surprised to learn that repairs are actually quite easy, requiring only a little knowledge about the appliance and a little patience. Let’s get started with some basic information.

Refrigerators and freezers consist of two basic components: a condenser coil and an evaporator coil. A liquid coolant is circulated through these coils by a compressor and a motor.

The refrigerant liquid is cooled in the condenser; it then flows to the evaporator. At the evaporator, the air in the unit is cooled by contact with the liquid-filled coil.

The condenser of a refrigerator or freezer is the coil on the outside of the unit; the evaporator is the coil on the inside. The coolant is circulated through the system by a compressor.

Most refrigerators and freezers are frost-free. In this type of unit, a heater is automatically turned on by a timer in order to melt the frost inside the unit.

Frost is melted by the heater at several different spots in the unit, starting with the coldest and most frosted areas. When the frost is completely melted, the thermostat automatically switches to a cooling cycle in order to maintain the standard freezing temperature.

Because this process is automatic, frost does not build up inside the box.

The unit’s compressor system, which forces the coolant through the coil system, is driven by a capacitor-type motor.

Other basic parts of the cooling/defrosting system include switches, thermostats, heaters, condensers, and fans. A do-it-yourselfer can test and replace many of these refrigerator components. However, there are exceptions, as explained later, that are best left to a professional repair person.

Caution: Before doing any work on a refrigerator or freezer, make sure it’s unplugged. After unplugging the unit, check to see if the motor/compressor has a capacitor; this component is located in a housing on the top of the motor.

Capacitors store electricity, even when the power to the unit is turned off. Before you do any work on a capacitor-type refrigerator or freezer, you must discharge the capacitor, or you could receive a severe shock.


Discharing a Capacitor

To discharge the capacitor:

Step 1: Unplug the refrigerator or freezer.

Step 2: To gain access to the capacitor, remove the service panel over the back rear portion of the unit or the service panel on the front of the unit below the door, as detailed later for disassembly. The capacitor is located in a housing on the top of the motor/compressor unit; it looks like a large dry cell battery.

Step 3: To discharge the capacitor, use a 20,000-ohm, 2-watt resistor — an inexpensive wire unit available at most electrical supply stores. Fasten the probes of the resistor to the terminals of the capacitor; this discharges the capacitor. If the capacitor has three terminal posts, connect the resistor to one outer terminal and the center terminal, then to the other outside terminal and the center terminal. After discharging the capacitor, you can proceed with the repairs.

Disassembling the Refrigerator
The control components of a refrigerator are usually located in the top or upper section of the unit. The motor, compressor, condenser coil, and condenser fan are located in the bottom section.

To gain access to the components in the upper section of the unit, remove the retaining screws or pry out the clips that hold plastic or metal panels over the parts. These fasteners may be hidden by trim or molding; in this case, pry off the trim or molding with a stiff-bladed putty knife. Protruding controls may also serve as retainers for the various panel sections. In most refrigerators, the shelves can be removed to allow access to some of the panels.

To gain access to the lower section of the refrigerator, remove a service panel held by retaining screws at the back of the unit below the condenser coils. The unit may also have a front access panel below the door. This panel may be held by retaining screws, or it may slip up and off two side brackets. On some models, you can tip the refrigerator over and test and service parts from the bottom. In this case, the refrigerator must be defrosted, unplugged, and emptied before any servicing can be done.

The condenser and evaporator coils and the compressor are sealed units on most refrigerators. If a malfunction occurs within these parts, call a professional service person. Other parts can usually be unscrewed or pried loose from mounting brackets.

Testing the Power Cord

If the cord of the unit looks frayed, or if you see burn marks on the prongs of the plug or at the terminal screws — on the terminal block, under the rear access panel of the unit — the cord may be faulty. Test the cord with a VOM set to the RX1 scale (instructions for using the VOM can be found here).

An enormous number of refrigerator problems can stem from the simple opening and closing of the door. From improper temperature to an abundance of frost, door maintenance could solve all your problems. To learn how to service your refrigerator door, move on to the next section.

Servicing a Refrigerator Door

If you find that your refrigerator’s compressor is constantly running — wasting energy and cutting down the life of your appliance — it could be due to problems with the door. Ideally, the climate inside a refrigerator would never be broken, and the unit could maintain a steady temperature all the time. Of course, we have to open our refrigerators many times a day. Here are some tips to keep your doors working properly and to keep the warm air away from your food.

Servicing the Door Gasket
When a refrigerator gasket (usually a rubber seal around the door) becomes hard or cracked, its seal is broken, and the unit’s efficiency drops sharply. Test the door gasket for leaks by placing a dollar bill between the gasket and the door jamb and closing the door. Pull the bill out. If it offers some resistance, chances are the gasket fits properly. If the bill comes right out, or falls out, the gasket is faulty and should be replaced. Test the gasket at several locations around the door. Before you replace the gasket, check the door hinges for leakage.

To replace a gasket:

Step 1: Buy a gasket made specifically for the model refrigerator you own. So-called fit-all gaskets may fit after a fashion, but tailoring them to the door’s configuration can be a tough job. If you aren’t sure about the model number of your refrigerator, cut out a small section of the gasket and take the sample to an appliance dealer for matching. If the gasket has to be ordered, you can glue the section back into the gap with rubber cement for a make-do repair until the new gasket comes in.

Step 2: Let the new gasket sit about 24 hours in the room with the refrigerator to bring it to the correct temperature and humidity, or soak the gasket in warm water to make it pliable.

Step 3: Begin removing the old gasket. Door gaskets are held by screws, clips, or adhesives, and the gasket may have a retaining strip, which helps shape it and provides a fastening tab or guide. On some units, the gasket may be held in place by the edge of the door panel; the panel is fastened with spring-steel pressure clips, bolts, or screws. To remove the gasket, remove the fasteners that hold it and remove any retaining strips; or remove the fasteners that hold the door panel.

Step 4: Finish removing the fasteners on one side of the door at a time. Do not remove the entire door panel. If the gasket is held by spring clips, be careful not to pry too hard on the clips; they’re under tension and could spring out of their mountings. If the gasket is held by adhesive, pry it off with a putty knife.

Step 5: When the old gasket is off, clean the mounting area thoroughly with mild household detergent and water. Remove stubborn adhesive with mineral spirits and fine steel wool, followed by a detergent/water rinse.

Step 6: Start the replacement at one side of the top of the door. Work down the sides to replace the entire gasket. Smooth the gasket evenly into place, easing it around corners. Use gasket cement to secure it if the manufacturer specifies this step. Make sure the gasket lies flat, with no lumps or curled edges.

Step 7: Replace the fasteners, retaining strips, or panel that held the old gasket. After the gasket is in place, tighten or loosen the mounting bolts necessary to adjust the gasket to the door jamb. If the gasket is glued in place, there isn’t much you can do but wait for the gasket to conform to the door jamb.

Test the gasket on a freezer door with the same dollar-bill procedure; if the gasket is faulty, replace it with a new gasket made especially for the freezer. Do not remove the freezer door to replace the gasket. Freezer doors are often tensioned with spring devices, which can be very troublesome to replace after the door has been removed, and on some models wiring has to be disassembled as well.

Servicing Door Hinges
A worn or broken door gasket may not be the cause of door leaks. Misaligned and loose door hinges can cause the door to rock or sag slightly, making even a well-fitted gasket ineffective.

Step 1: If the door won’t shut tightly, tip the refrigerator slightly backward by propping up the front of the unit or unscrewing the front leveling legs two complete turns. Experiment with this adjustment until the door stays closed, but don’t tip the unit very far out of front-to-back level.

Step 2: If leveling doesn’t work, tighten the hinge screws. You may have to open the door (especially the freezer door) to turn these screws. On some units, you may have to remove a hinge cap or trim to reach the screws; pry off the cap or trim with a screwdriver. Sagging and looseness can be corrected by shimming the door hinges. Loosen the hinge and place a hinge-shaped cardboard shim between the hinge and the door. Then tighten the hinge again. Sagging may also be caused by a wrongly placed shim. In this case, you can correct the problem by removing the shim. Experiment with the shims; you may be able to eliminate the sagging.

Step 3: If the door is warped, tighten the screws that hold the inner door shell to the outer door shell. You may have to change or adjust the door gasket after making this adjustment.

Step 4: Check the catch. Newer units have a magnetic catch on the door. If the door doesn’t latch properly, remove the magnetic strike from the inner door shell and shim it slightly with a piece of thin cardboard. You may have to adjust the gasket to conform with the new shim.

Servicing the Door Switch
On the refrigerator door jamb, locate a small push-button switch. This component operates the light inside the refrigerator. If the switch is malfunctioning, the light in the unit may stay on, and the heat from the lightbulb can cause cooling trouble in the box.

Step 1: Check the bulb to see if it is burned out. If not, depress the push button on the door switch.

Step 2: If the light stays on, clean the switch with a cloth. Then remove the switch from the jamb. Remove retaining screws hidden by a plastic trim piece, pry the switch out of the jamb with a screwdriver, or pry off the jamb trim to expose the switch. Then test the switch with a VOM set to the RX1 scale (instructions for using the VOM are given on page 19).

Step 3: Clip one probe of the VOM to each terminal of the switch and press the push button. The meter should read zero. If the needle on the scale moves above zero, replace the switch with a new one of the same type.

Step 4: Connect the new switch the same way the old one was connected.

Now that we have thoroughly exhausted door repair, there’s nothing left to do except move inside and learn about the internal components of a refrigerator. In the next section, you will learn everything from how to repair a leak to how to service your ice maker.

Servicing Internal Components

The inner-workings of a refrigerator can be a mixed bag. Some components are fairly easy to service or repair, while others should only be handled by professionals.

Servicing the Limit Switch
The limit switch is found only on frost-free refrigerators and freezers. Its function is to keep the defrost heating element from exceeding certain set temperatures. If a refrigerator has lots of frost in the freezer compartment, the problem may be the limit switch. However, other components — the evaporator fan, the defrost timer, and the defrost heater — can cause the same problem. Check these for malfunctions, as detailed below. If these parts are in working condition, the problem is most likely in the limit switch. Don’t try to fix the limit switch yourself; call a professional service person for replacement.

Servicing the Thermostat Control

The thermostat control is usually mounted inside the refrigerator. Its visible control knob is turned to regulate the refrigerator/freezer temperature. The workability of this control can be tested in various ways, depending on the problem. To test the thermostat control:

Step 1: If the compressor runs all the time, turn the control knob to the OFF position. If the compressor still runs, unplug the unit, then pull off the control knob and remove the screws holding the thermostat in place. Pull out the thermostat and remove either the red or the blue wire from its terminal. Plug in the unit. If the compressor doesn’t run, the thermostat is faulty. Replace it with a new thermostat.

Step 2: If the compressor runs after the wire is removed from its terminal, there is probably a short circuit somewhere in the unit’s wiring. In this case, don’t try to fix the problem yourself; call a professional service person.

Step 3: If the refrigerator or freezer runs but the box doesn’t cool, unplug the unit and remove the thermostat with a screwdriver. Disconnect both wires from the thermostat. Tape the ends of the wires together with electrical tape, and plug in the appliance. If the refrigerator starts and runs normally, the thermostat is faulty. Replace it with a new one of the same type. Connect the new thermostat the same way the old one was connected.

Step 4: If the freezer compartment is normal but the refrigerator box doesn’t cool, set the dials that control both compartments to mid-range. Remove these knobs (they’re usually friction-fit). Then unscrew the temperature control housing; you’ll see an air duct near the control. Replace the knob on the freezer thermostat and turn the control to the OFF position. Open the refrigerator door and look closely at the air duct. If this duct doesn’t open wider in about ten minutes, the control is faulty. Replace the control with a new one of the same type. Connect the new control the same way the old one was connected.

Servicing the Evaporator Fan
In some cases, a faulty thermostat may not be the cause of a warm refrigerator or freezer. A warm box may also be caused by a defective fan, a blocked fan, or broken or bent fan blades. If the blades are jammed, try to free them. If they’re bent, straighten them with pliers. If this doesn’t solve the problem, call a professional service person.

On some refrigerators, the door switch operates the evaporator fan. If the fan seems to be malfunctioning, the door switch could be faulty. Test the switch as detailed in the last page, and replace it if necessary.

Servicing the Defrost Timer
If the compressor doesn’t run, it is likely that the defrost timer is malfunctioning. This part is located near the compressor. To test the defrost timer:

Step 1: Unplug the refrigerator.

Step 2: Disconnect the wires from the timer and timer motor. Remove the timer from its brackets by backing out two retaining screws.

Step 3: Test the defrost timer with a VOM set to the RX1 scale. Clip one probe of the VOM to each defrost timer — not motor — wire, and turn the timer control screw shaft until it clicks. If the defrost timer is functioning, the meter will read zero. If the needle jumps, the defrost timer is faulty. Replace it with a new one of the same type.

Step 4: Connect the new defrost timer the same way the old one was connected.

To check the defrost timer motor, clip one probe of the VOM to each motor wire, setting the scale to RX100. If the meter reads between about 500 and 3,000 ohms, the motor is functioning properly. If the meter reads higher than 3,000 ohms, the timer motor is faulty. Replace it with a new one of the same type. Connect the new motor the same way the old one was connected.

Servicing the Defrost Heater
This component is a heating element located on the evaporator coil. When the refrigerator or freezer switches to the defrost cycle, the defrost heater is turned on to melt the frost in the compartment. Failure of the defrost heater causes failure to defrost.

Test the element with a VOM set to the RX1 scale. To gain access to the heating element, remove the compartment’s wall panels. Clip one probe of the VOM to each element terminal. The meter should read between 5 and 20 ohms. If it doesn’t, the heating element is faulty and should be replaced. Replace the heater with a new one of the same type and electrical rating. Connect the new heater the same way the old one was connected.

Servicing the Condenser Fan
The condenser fan is located under the unit. If the fan is malfunctioning, the refrigerator or freezer won’t cool properly, or it will run continuously or not at all.

Test the fan with a VOM set to the RX1 scale. Disconnect the electrical wires to the fan motor and clip one probe of the VOM to each fan motor terminal. If the meter reads from 50 to 200 ohms, the motor is functioning properly. If the meter reads higher than 200 ohms, the fan motor is faulty and you should replace it.

While you’re working on the fan motor, make sure the fan blades are clean and unobstructed. If the blades are bent, carefully straighten them with pliers.

Clearing the Drain Ports
The drain ports are located along the bottom of both the freezer and the refrigerator sections of the unit. These holes can become clogged with debris or ice, causing a drainage problem when the unit is defrosting. To clear the ports, use a short section of wire that will fit the holes. Do not use a toothpick, because the wood may break off in the port and become stuck. On some refrigerators, the drain ports are located near the defrost heater at the evaporator coils. A lot of disassembly is required to clean this type of unit. If the refrigerator or freezer is this type, you may be better off calling a professional service person to clear the ports.

On some freezer compartments, the drain is located under the freezer compartment and shaped like a shoehorn. This type of drain can usually be unscrewed so that the drain area can be cleaned.

Servicing the Drain Hose and Pan
The condenser fan is located under the bottom of the refrigerator. During the defrosting cycle, water may run through a small hose into the drain pan and is naturally evaporated. On some refrigerators, the drain hose is rubber instead of metal. This type of hose can become cracked, causing leaks. Examine the hose. If it’s damaged, replace it with a new one of the same type. If you spot water on the floor, the drain pan may be tipped on its brackets, or the pan may be cracked or rusted. To eliminate the leak, realign or replace the pan.

Servicing Ice Makers
Freezers with automatic ice makers sometimes malfunction because the water inlet valve strainer that feeds water to the ice maker becomes clogged. To correct this problem, unplug the appliance and disconnect the water supply. Remove the water line where it enters the valve–usually at the bottom edge of the unit. Locate the wire strainer and remove it. Clean the strainer with a stiff brush, using mild household detergent. Reassemble the component in reverse fashion.

Servicing a Refrigerant Leak
Coolant leaks are identifiable by their acrid smell. There is nothing you can do to repair a coolant leak except call a professional service person to deal with the problem.

Servicing the Motor/Compressor
The compressor and motor of a refrigerator or freezer are contained in a sealed unit. If you trace problems to either of these components, do not try to fix the unit yourself. Call a professional service person.

As you’ve seen, some common refrigerator problems (like faulty gaskets) can easily be repaired at home, while others (like a motor or compressor) are beyond the scope of the average handyman. Now you know how to make the small repairs, as well as when you’ve met your match.


Cooker and Oven Repair

Cooker and Oven Repair

Cooker and Oven Repair – Gas and electric ranges and ovens operate fairly simply, and they’re usually easy to repair, mainly because the components are designed for quick disassembly.

Most of the malfunctions that affect gas ranges involve the supply and ignition of gas in the burners and the oven. Most malfunctions that affect electric ranges and ovens involve faulty heating elements. In this article, we’ll discuss how the main parts should work on gas and electric ranges and ovens and how to service them regularly to avoid larger, more expensive problems.

The first step is taking a peek inside to assess the problem.Caution: Before doing any work on a gas range or oven, make sure it’s unplugged, or turn off the electric power to the unit by removing a fuse or tripping a circuit breaker at the main entrance panel or at a separate panel. If there is a grounding wire to the range, disconnect it. Also close the gas supply valve to shut off the unit’s gas supply.


How to Repair a Microwave Oven


Microwave ovens operate much like Microwaves. However, a Microwave oven is more complex and is typically more expensive to purchase. The higher cost means that repairs are easier to justify. You will probably think twice before tossing a $75 Microwave oven into the recycle bin.

And because Microwave ovens are less compact, they are often easier to work on than pop-up Microwaves. Some Microwave ovens simply toast bread and related food products horizontally rather than vertically as with pop-up Microwaves. Other Microwave ovens are actually miniature ovens.

The differences are identified by the wattage used — broilers require more watts of electrical power to operate — and by the controls. Some Microwave ovens allow you to bake and broil foods, offering precise temperature and function control.

How Microwave Ovens Work

To operate a Microwave oven, controls are set, the door is opened, food is placed on a tray, and the door is closed. If set for toasting, a Microwave thermostat operates the upper and lower heating elements as selected by the color controller.

If set for baking or broiling, the baking thermostat operates the heating elements as selected by the temperature controller and possibly by a timing mechanism. There are a variety of Microwave oven models, each with its own features. However, most operate in the same manner and can be diagnosed and repaired by applying the suggestions that follow.

How to Repair a Microwave Oven / Cooker

Typical Microwave oven repairs include servicing the main switch, the thermal fuse, the heating element, and the solenoid.

Servicing the Main Switch: The Microwave oven’s main switch is an important operating part, one that gets extensive use and is a frequent culprit when things go wrong. In many cases, all that’s required is cleaning the switch. In others, the switch must be replaced. To access and replace the main switch:

Step 1: Remove the side panel and, if necessary, the power cord.

Step 2: Check the contact points for pitting or discoloration.

If they are not making good contact, carefully rub them with very fine sandpaper, then clean them with an electrical

contact cleaner spray or isopropyl alcohol on the end of a cotton swab. Be careful not to bend the contact leaves out of alignment.

Step 3: If the contacts are fused or the leaves broken, remove and replace the main switch. Main switches are fastened to the chassis with clips, screws, or rivets.

Servicing the Thermal Fuse: A thermal fuse protects the Microwave oven’s main switch from damage caused by an electrical overload. If the main switch doesn’t work, check the thermal fuse using a continuity tester or multitester. The thermal fuse should show continuity rather than an open circuit. If defective, remove and replace the thermal fuse with one of identical rating. In most models, this means cutting the fuse leads or wires and replacing the fuse unit.

Some Microwave ovens use a bimetallic thermostat or thermal cutout to protect the adjacent main switch from damage. Inspect the thermal cutout for debris, distortion, or discoloration. Clean debris away with a can of compressed air. As needed, clean the contact points with emery paper.

Servicing Heating Elements: A heating element is vital to your Microwave oven. It may only be on for a few minutes to toast bread, or, in the case of a baking/broiling unit, it may be on for an hour or more at a time. A heating element is simply a high resistance wire that glows as electricity flows through it. Heating elements, then, are easy to test. Here’s how:

Step 1: Determine whether or not there is a clear path for electric current by touching a continuity tester or multitester probe to each end of the element.

Step 2: If there is no clear path, remove the heating element. Removing an element may be as easy as unscrewing both ends and any support brackets; however, it may also require that rivets be removed and replaced. Your decision to replace a defective element will then depend on how easy it is to remove as well as the value of the Microwave oven.

Step 3: Once the heating element has been removed, replace it with one of identical rating and structure. Be very careful not to distort the shape of the new element as it is installed. Element wires are fragile and can be damaged easily. Higher-wattage elements are of thicker wire, much like the element in your conventional oven.

Servicing a Solenoid: The solenoid turns the electric current to the heating elements on and off. If the heating elements stay on longer than they should and burn your food, or if opening the appliance door turns them off, the solenoid may be defective. To test and replace a solenoid:

Step 1: Look at the unit for visible damage and smell the area around the solenoid for obvious damage to components.

Step 2: Use a continuity tester or multitester to verify your findings.

Step 3: Replace the solenoid. In some units, this is easy. Simply unscrew the brackets and remove the unit. If replacing the unit requires cutting or desoldering, take the unit to an appliance-repair shop for service.

Mmm…what would go great with that hot buttered slice of toast? A hot cup of coffee, of course. So what do you do when your coffee maker is no longer cooperating with your morning routine? See the next page for suggestions.


Water Dispenser Repair in Mombasa and Nairobi

WATER DISPENSER SERVICES IN MOMBASA AND NAIROBI

Water Dispenser Repair in Mombasa and Nairobi : A water dispenser is a device that stores water and dispenses it when the user presses a button, moves an external piece up or down, etc. Water dispensers are often combined with water coolers and/or water heaters, which change the temperature of water as well as store and dispense it.

Water coolers are often purchased to give users access to refreshingly cold water through either vapor compression refrigeration or thermoelectric cooling. Alternatively, water heaters are used to make heating water for hot beverages such as coffee, tea, hot chocolate, etc. a more convenient process. Some water dispensers also include built-in filtration methods.

There are a few different types of water dispensers. These include bottleless and bottled water coolers. Bottleless water coolers are hooked up to a water supply, while bottled water coolers require delivery (or self pick up) of water in large bottles from vendors. Additionally, water dispensers can either be freestanding devices or designed to be mounted against a wall.

Water dispensers have a variety of appearances, but they all include some sort of water tank, nozzle, and water dispensing control. Water dispensers are produced by numerous manufacturers, including Avalon, Brio, Farberware, Giantex, and more.

water dispenser repair in mombasa and nairobi

WATER DISPENSER REPAIR IN NAIROBI

We offer water dispenser services in Nairobi including repair, Maintenance, cleaning, installation, parts and spares and more water dispenser services.

We service top load water dispenser, bottom load and countertop water dispenser of all makes and models of brands including whirlpool, NewAir, Avlon, Clover, Glacier maximum stainless, bruhm, ramtons, syinix, generic, macro, sterling, dayliff, bluelans, armco, hotpoint, sayona, ashton meyers, ariston

WATER DISPENSER FAULTS THAT WE REPAIR IN NAIROBI

1. Slow water flow from the dispenser.
2. Water dispenser leaking
3. No water flow in the dispenser
4. Moulds and algae growing inside water dispenser.
5. Water from the dispenser tastes funny or bad
6. Water leaking from the dispenser drip tray.
7. Water Is Not Hot.
8. Water Is Not Cold.
9. Dripping tray leaking.

We handle machines such as wall-mounted, Bottom-load water dispenser, Tabletop water dispenser, Direct-piping water dispenser, freestanding water dispenser Water Dispenser Repair Services In Nairobi Kenya Are you looking for Water Dispenser Repair Services in Nairobi Kenya? REPAIR connects you with reputed also as verified water dispenser repair service experts.

You’ll book an expert and obtain your water dispenser fixed to possess safe beverage. REPAIR is the top most choice of users for hiring water dispenser repair experts as we provide A large base of verified and experienced water dispenser repair service providers

Affordable Water Dispenser Repair Service Charges

At REPAIR , we help in saving time and efforts by providing you with the list of skilled water dispenser repair experts. All that you simply got to do is answer the straightforward questions and fill the shape together with your contact details and requirements.

The experts meeting your needs would contact you at the given contact number. You’ll ask the expert regarding your issues with the appliance and therefore the service charges also. After comparing the fees of the experts, you’ll book the one that suits your budget. Hiring Guide for Water Dispenser Repair Service in Nairobi, Kenya

Water Dispenser Repair Services in Nairobi Kenya

How To get Water Dispenser Repair Service near you in Nairobi

Water is a crucial aspect of living. Without water, there’s no life. a bit like air, we’d like water to survive. to steer a healthy life, we’d like an honest supply of safe beverage. A water dispenser is an appliance that facilitates the straightforward supply of hot, moderate and cold water.

it’s used at different places like houses, hospitals, restaurants, and workplaces to store clean beverage. to form the simplest use of this equipment, it’s essential to stay it clean and well-maintained. In case, there’s any problem within the water dispenser, you’ll catch on repaired by an expert.

REPAIR is the simplest platform to seek out a talented water dispenser repair service expert. You’ll fill the straightforward form and book the service.

Water Dispenser Repair Service At REPAIR?

REPAIR provides you with a simple and straightforward thanks to book the service. to rent an expert for the repair of your water dispenser, you would like to fill the straightforward form together with your specifications. Supported the required requirements, our experts would put you in-tuned with the simplest service providers.

The water dispenser repair service providers from your locality would get in-tuned with you at the required convenient time. You’ll have a word with the experts regarding the service and obtain the service quotes. You’ll check the reviews of the previous customers for knowing the service quality.

After comparing the ratings and repair charges, you’ll book the simplest expert for the service.

Our Water Dispenser Repair services

The experienced and reputed professionals offer expert water dispenser repair service. Be it servicing, water leakage, cooling, or heating, you’ll hire the technician for any quite issue. The list of services offered by REPAIR listed experts include
• Water Dispenser Installation
• Water Dispenser Maintenance Services

Common Water Dispenser Issues that we repair

Wear and tear of an appliance is extremely common and obvious. With the regular use of an appliance and ignorance to the minor issue may result within the decrease of performance and efficiency. However, with proper cleaning and regular service, it’s possible to extend the efficiency and time period of the merchandise. Because hiring an experienced and skilled technician is that the best thanks to resolve technical issues. Just in case you experience any issue with water dispenser, you’ll hire the expert services. Here are some common issues that you get you’ll hire a water dispenser repair service expert.

Water Dispenser Leaking

Usually, first-time users get confused between an overflowing drip and a leaking device. In offices, the water dispenser is employed by many of us and there are chances that they eliminate the water within the drip tray. You’ll empty the drip tray to avoid the spillage and check if there’s leakage.

The rationale behind the leakage might be the improper closing pf the rear valve of the device. You’ll make sure part and ensure if that’s well-sealed. Even after this if you experience water leakage, you would like to contact a water dispenser service expert.

Water Dispenser Repair Services in Nairobi Kenya

• Water Tastes and Smells Bad
It is claimed that water is pure if it’s tasteless, odorless, and colorless. If you experience odour and sudden change within the taste of water, then there’s a problem. Sometimes, the dirt accumulates at the taps, so wiping the taps is that the initiative. The rationale behind the bad taste and odour might be the due filtration process. However, if the sterilization and filtration process is already done, you would like to book the water dispenser repair service immediately.

Water Dispenser Repair Services in Nairobi Kenya
• Water isn’t Cold
If the water dispenser isn’t providing the cold water, you would like not panic. Someone may need emptied the cold-water tank. And it takes to refill and chill the water. The adjustment within the temperature of the water dispenser. Also can be the rationale behind this problem. Just in case none of the above applies and you continue to don’t receive the cold water, the cooler could be broken. To repair or replace the broken part, you would like to rent a water dispenser repair service.

• The dispenser isn’t Pouring Out Enough Water
The faucet could be pouring out insufficient water. Cleaning the faucets can help in resolving the matter. If cleaning the faucets doesn’t make any difference, the dispenser may need trapped air in it. Removing the bottle and pressing the taps together after putting it back, you’ll remove the air and use the dispenser. If doing all this doesn’t help and dispenser pours little water, you’re advised to rent a water dispenser repair service.

• Broken Tap
With the pressure and rough and hard use, the faucet of the water dispenser might get crack. Ignoring the cracks at the initial stage might end in the breakage of the faucet. For replacing the broken tap, you’ll take the assistance of the technician.


Washing Machine Repair in Mombasa and Nairobi

Washing Machine Repair in Mombasa

Washing Machine Repair : It’s laundry day. You know this because the shirt you’re wearing is eight years old and doesn’t match your pants in any light. And there’s a chance, just a chance, that you’re wearing one black sock and one Navy blue sock. So you schlep a heaping hamper to the laundry room and carefully (or not so carefully) separate colors from whites. Then, you cram as many as will fit into the washing machine, throw in some detergent and hit the START button.

washing machine repair in mombasa washer spare parts washing machine installation and maintenance nairobi kenya

Suddenly, the piece of machinery you could always count on is on the fritz. Washing machines are the workhorses of the household appliance stable — in fact, there’s even a TED Talk about how they’re the most important invention of the Industrial Revolution (source: Rosling]. And when they go down, they’re the toughest to get by without. Who wants to drag their laundry down the street to the laundromat and fight other people for the privilege of shoving quarters into a strange machine that you suspect may not take the gentle cycle very seriously?

So, you have a choice to make: Call a repairman or see if you can tackle the problem yourself. Because washing machines do so many things, they may be harder to diagnose than they are to repair. For a household appliance, it’s a pretty complicated gizmo – with special timing cycles that operate valves, motors that turn water on, spin the tub, drain water, and control the water temperature.


But diagnosis is possible, even for the do-it-yourselfer. It just takes a little patience and a basic understanding of washing machine mechanics. In this article, we will explain how to troubleshoot your washing machine and describe some quick repairs for common malfunctions.


As we mentioned, washing machines are complex, but there are some simple steps you can take to diagnose common washer problems.

Is the washer receiving power? The first line of defense for any electrical repair is the sincere hope that it’s as simple as a loose plug, damaged cord or malfunctioning wall outlet. If all of these check out, it could be a blown fuse or circuit breaker. Either of these can still be a pretty simple fix. But if the machine is receiving power and still not operating, then it’s probably time to get to know your washing machine on a deeper level.

After checking for power, the next thing to look at is the water supply. Knobs may get turned inadvertently or hoses could become kinked, so a quick inspection of these parts may yield an answer. Make sure that both water faucets are turned on and that all hoses are properly extended, without kinks. If the washer has a water-saver button, make sure the button is depressed.

If it’s not a power or water source issue, the next logical problem may be that the washing machine is not working properly because it needs to be cleaned. In the next section, we’ll discuss how to keep dirty clothes from creating a dirty washer.


Washing Machines Need Cleaning, Too


We interrupt this scintillating mechanical exploration of washing machine mechanics to bring up a very important matter: why your laundry might stink even after a fresh wash. It may be that your washer is dirty. Here’s how to clean a washing machine:

Regularly clean the top and door of the washer to prevent the buildup of dirt and detergent. When you wash very linty materials, pull lint from the tub after removing the laundry. Built up lint can keep water and detergent from properly circulating and soap deposits themselves may cause laundry to smell bad. To solve this problem, fill the tub with water and add 1/2 cup of baking soda or 3 cups of white vinegar; then run the machine through the complete wash cycle sans laundry [source: DIY Life]. If the deposits are really bad, wash the inside of the tub with a solution of household ammonia and mild detergent. Rinse thoroughly and wipe the tub with liquid bleach. A word of caution: Rinse the tub thoroughly before wiping it out with bleach. The combination of ammonia and bleach forms a potentially dangerous gas called chloramine. This compound can cause health issues ranging from mild skin irritation to digestive and kidney problems [source: CCAC]

Finally, run the machine through a complete wash cycle before you put any more laundry in. Hopefully, you were able to address your issue with these simple steps.

But if your problem persists, don’t despair. In the next section, we’ll discuss disassembling the washer for more thorough repairs.


A Look Under the Hood: Disassembling the Washer


For most repairs and maintenance, the washer cabinet usually requires disassembly. The washer cabinet is where the magic happens, and houses all of the electrical components of the washer. Location varies by manufacturer, but typically this can be found on the top of the machine behind the control panel. This can be relatively simple based on the make and model, but be sure to consult the owner’s manual to find out how to disassemble your particular machine properly. Caution: Make sure the power cord and water hoses are disconnected before you disassemble the cabinet or tip it over for service.

Here are three steps for basic washer disassembly:

Step 1: Removing the control panel, typically located on top of the machine, usually requires loosening and/or removing a set of retaining screws. These may be located under a piece of molding or trim that needs to be removed in order to see them. Knobs on the control panel are usually friction-fit and will pull off, while others are held by small setscrews, which do not have heads like a typical slotted screw, at the base of the knob. Loosen the setscrews with a screwdriver or Allen wrench and pull the knobs straight off the shafts.

Step 2: To remove the service panel, you also need to remove the retaining screws. First, make sure the machine and the hoses are drained of water. Tip the washer over on its front or side to gain access through the bottom of the machine, which is generally open and doesn’t have a service panel.

Step 3: To remove the top of the cabinet, insert a stiff-bladed putty knife into the joint between the top and side panels and give the knife a rap with your fist. This should release the spring clips so that the top can be removed.

Part of what makes washers so hard to repair is that they have so many control devices (components that control other functions, such as switches and timers). Now things start to get a bit more complicated, but don’t give up yet. In the next section we will walk you through servicing these slightly more sophisticated parts.


Which Switch to Fix?


Washing machines run through elaborate cycles with multiple settings, which makes them different from your typical household appliance, a toaster for instance, that may perform just one or two functions. Here’s how to repair some of the common switches and timers.

Lid Switch

The lid switch on a washer often serves as a safety switch, and if it’s not working, or if the switch opening in the lid is clogged with detergent, the machine will not run. To check and repair the lid switch:

Step 1: Unplug the machine. You can clean out the lid switch port using a wooden manicure stick or even a chopstick.

Step 2: If cleaning doesn’t help, remove the top of the cabinet to access the switch itself. With the switch exposed, check to make sure the screws have not become loose. Loose screws can cause the switch to move when the lid is closed or as the machine goes through its cycles. Check the terminals of the switch to make sure they’re tight.

Temperature Selector Switch

This control panel switch regulates the temperature of the water in the tub. It also plays a role in controlling the fill cycle. If you suspect this switch is faulty, remove it and take it to a professional service person for testing because this takes special equipment.

If there’s a problem with both water temperature and tub filling cycles, both the temperature switch and the timer may be faulty. Procedures for testing the timer can be found on the following page.

Water Level Control Switch

This is another control panel switch, usually located next to the temperature switch. There should be a small hose connected to this switch, and sometimes, this hose becomes loose and falls off the connection. When this happens, the water in the tub usually overflows. To solve this problem, cut about 1/2 inch off the end of the hose and use a push fit to reconnect it to the switch. A push fit is a simple metal fitting that fastens into place by a row of small teeth that grip the tubing. The switch itself can also malfunction, resulting in tub overflow and other water-level trouble in the tub. If you suspect this switch is faulty, remove it by backing out the screws holding it in place and take it to a professional service person for testing.

If you’ve gotten this far and your washer is still broken, don’t give up now. We’re only getting started, and your laundry isn’t going anywhere. Keep reading because in the next section we’ll discuss why it may just be bad timing.


Timer Troubles


The timer controls most of the operations of the washer: water level, tub filling and emptying, length of cycles and cycle-setting sequences. For this reason, any repairs to the timer should be made by a professional service person. However, there are a couple of checks you can make yourself when you suspect the timer is faulty.

Step 1: Unplug the washer. To access the timer, remove the control knobs and the panel that covers the controls. This is usually the same control panel we discussed earlier, but may also be accessed be through a panel at the back of the unit. Carefully examine the wires that connect the timer to the other parts of the washer. If the wires are loose or disconnected, try pushing them into position; they usually fit into their terminals like plugs. Use long-nosed pliers to push them into position in order to avoid breaking the wire connections — never pull a wire by hand.

Step 2: To test the timer, use a volt/ohm meter (VOM) set to the RX1 scale. The RX1 scale is the lowest and should be the default setting of the meter. Disconnect the power leads to the timer and clip one probe of the VOM to each lead. The VOM should read zero if the timer is working. Since the timer is a multipurpose switch, turn it through its cycle and test each pair of terminals in turn. The meter should read zero at all of these points. If one or more readings are above zero, the timer is faulty and should be replaced.

Step 3: To replace the timer, unscrew and disconnect the old one. Install a new timer made specifically for the washing machine. Disconnect the old wires one at a time, connecting each corresponding new wire as you work to make sure the connections are properly made. After all the wires are connected, check the connections again for correctness and screw the timer assembly into place.

Now we’re having some serious fun! Actually, you’re probably thinking about which is more painful, reading about laundry or actually doing it. Take heart — we’re approaching the spin cycle and you’ll be done soon.


Rub-a-Dub-Dub: Servicing the Tub and Valves


If your washer is overflowing or is excessively noisy, the tips on this page may be able to help you solve your problem.

If the washer won’t fill or fills very slowly, if it overfills, or if the water is the wrong temperature, the water inlet valves could be faulty. These components are easy to locate and very easy to replace, at little cost. When you suspect an inlet valve is broken, first check to make sure the water faucets are fully turned on and properly connected to the hot and cold inlets of the valves. Then check the screens in the valves; if they’re clogged, clean or replace them. If water doesn’t enter the tub, set the temperature control to the HOT setting. If there is no water, set the control to the WARM setting. If all that comes out is cold water, the hot-water inlet valve is not working. Reverse the procedure to test the cold-water valve, setting the control first on COLD and then on WARM. If the tub overfills, unplug the washer. If water still flows into the tub, the valve is stuck open. In any of these cases, the valves should probably be replaced.

Here’s how to check the valve assembly:

Step 1: Remove the back service panel and disconnect the hot-water and cold-water hoses to the valves.

Step 2: Remove the hoses connected to the valves inside the cabinet. Also disconnect the wires from the terminals. Back out the screws holding the valves to the machine. The inlet valves have solenoids (a coil of wire that carries a current) inside the housing.

Step 3: Tap the solenoids with a screwdriver handle. If this doesn’t work, replace the entire inlet valve assembly. Install it in the reverse order of the way you disconnected the old one.

If laundry is torn during the wash cycle, feel around the tub. If you find a rough spot, you may be able to smooth it with an emery board or light sandpaper. If this doesn’t work — or if you have to cut to bare metal to remove the roughness — the tub should be replaced. In this case, it’s probably much wiser to replace the entire washer.

You’ve probably noticed, but now we’re getting into the really sticky problems. By now, the weekend warriors have abandoned all hope and are strolling through the aisles of Home Depot. But not you. In the next section, we’ll test your mettle with more miscellaneous mechanical gobbledygook.


Agitate This: Servicing the Agitator


The agitator — the finned part that fits on the tub shaft — can also tear laundry if the fins are cracked or broken. You may be able to solve the problem temporarily by pinching off the splinters with pliers and lightly filing the plastic smooth, but this is just a stopgap measure; the agitator should be replaced. Replace a damaged agitator with a new one of the same type. To do this, unscrew the cap on top of the agitator. With the cap off, pull straight up on the agitator; it should lift off. If it doesn’t move, rap its side with a hammer. If it still won’t lift off, drive wedges under the bottom rim of the agitator to dislodge it. Then, set the new agitator into place and replace the agitator cap.

Damage to the snubber, a pad-like device sometimes located under the agitator cap, can cause the machine to vibrate excessively. The snubber may have a suspension spring in it. Lift off the agitator cap and examine the snubber. If the spring is broken, or if the pad is visibly worn, replace the entire snubber. Snubbers might also be found at the top of the tub, under the transmission, or as part of the water-pump housing. Look around until you see it.

If the machine doesn’t have a snubber, listen for noise at the suspension unit between the tub and the machine cabinet. The suspension unit has fins or pads that may need replacement. In some cases, the entire unit may have to be replaced. Another noise point is the basket support nut, which holds the basin in place. You can imagine what kind of punishment that sucker takes. Tighten the nut or, if you can’t tighten it, replace it.

Sudden tub stops can be caused by a broken motor belt, but they are usually due to poor tub loading. Check to see if wet laundry is wadded around the bottom of the tub shaft, or under the basket or agitator assembly. Remove the basket or agitator in order to remove the laundry easily.

Next, we’ll take a look at water-related problems, starting with troubleshooting water leaks.


Troubleshooting Water Leaks


Water leaks in a washer are often difficult to trace. The problem could be a loose connection, a broken hose, a cracked component or a defective seal. It could also be a hole in the tub. If that’s the culprit, it’s usually best to replace the washer.

Tightening water connections can eliminate most leaks. Here’s how to do it:

Step 1: Check the lid seal. If faulty, replace with a new gasket.

Step 2: Check the hoses at faucet connections. Tighten connections or replace hoses.

Step 3: Check the hoses at water valve connections. Tighten connections or replace hoses.

Step 4: Check the drain hoses. Tighten connections or replace hoses.

Step 5: Check the inlet nozzles. Tighten connections or replace nozzles.

Step 6: Check the splash guard. Tighten connections or replace.

Step 7: Check any plastic valve. Tighten connections or replace.

Step 8: Check the outlet hose to drain. Tighten connections or replace hose.

Step 9: Check the water pump, using the procedures that follow on the next page

Now that you’ve checked the most likely sources for a water leak, you can reasonably rule out that as the culprit. On the following pages, we will cover tips for servicing the water pump, the belts and pulleys, and the motor.


Pump Problems: Servicing the Water Pump

Of all washing machine parts, the water pump probably takes the most punishment because it’s constantly in use. When the pump fails, you can hear or see the trouble: a loud rumbling inside the machine, or a failure of the water to drain out of the tub. Here’s what you can do to fix the problem:

Step 1: Check the drain hoses to make sure they’re draining properly. Remove the water supply hoses from the back of the washer. With long-nosed pliers, extract the filter screens from the valve ports in the washer or from the hoses themselves. These screens keep debris from collecting in the hoses and can become clogged. Wash the screens thoroughly. Then, replace them and reattach the hoses. If the machine still rumbles or doesn’t drain, examine the pump.

Step 2: To access the pump, first bail and sponge out any water in the machine’s tub. Then tip the washer over on its front, using a heavy blanket or pad to protect the washer’s finish. Remove the back service panel. The pump is usually located along the bottom of the machine, but with the unit tipped on its front, it’s easier to remove the pump through the back than through the bottom of the washer.

Step 3: Locate the pump. It has two large hoses attached to it with spring or strap clips. If the clips are the spring type, pinch the ends of the clips together with pliers to release them, and slide the clips down the hoses. If the hoses are kinked or crimped at these connections, straighten them as best you can and reconnect them. Then, try the machine again to see if this kinking was causing the problem. If the machine still doesn’t drain, you’ll have to remove the water pump.

Step 4: To remove the pump, loosen the bolt that holds the drive belt taut and move the washer motor on the bracket to loosen the belt. Move the motor out of the way and unbolt the pump. As you loosen the last mounting bolt, support the pump with your hand. Then, lift the pump out of the washer.

Step 5: You should take the pump apart if you can because the trouble could be lint, dirt or pieces of cloth. Clean away all debris inside the pump and clear any debris out of the water tubes. Reassemble and hook up the pump again and test it. If cleaning the pump doesn’t put it back into working order, or if the pump housing can’t be removed, replace the pump with a new one of the same kind.

Step 6: To install the new pump, set it into position and connect the mounting bolts to the pump housing. Move the motor back into position. Tighten the drive belt (the rubber belt that connects two shafts of the motor) by prying it taut with a hammer handle or pry bar; it should give about 1/2 inch when you press on it at the center point between the two pulleys.

Step 7: Reconnect the hoses leading to the pump.

If the pump’s not your problem, other mechanical issues may be afoot. If your belts and pulleys are to blame, find out how to fix them on the next page.


Belts and Pulleys and Motors, Oh My!


The drive belt (or belts) of a washing machine may become worn or damaged, causing noisy operation or stopping the washer entirely. Fortunately, a damaged drive belt is easy to replace. Remove the back panel of the washer to gain access to the belt and then follow these steps to remove it:

Step 1: Loosen the bolt on the motor bracket and move the motor to put slack in the belt. The motor bracket is a simple metal brace that holds the motor housing in place.

Step 2: Remove the old belt and stretch a new one into place on the pulleys.

Step 3: To put tension on the new belt, use a hammer handle or a short pry bar to push the motor into position while you tighten the bolt in the adjustable bracket. The belt should have about 1/2 inch deflection, or give, when you press on it at the center point, midway between the pulleys. If the belt is too loose, it will slip on the pulleys, causing the machine to malfunction. If the belt is too tight, it will wear very quickly and will probably become so hot that it will start to smoke or smell.

Loose pulleys can also cause problems. Most pulleys are fastened to shafts with setscrews around the hub of the pulley. Remember, setscrews do not have heads so you might have to look closely to see them. These screws must be tight, or else the pulley or belt will slip. The resulting malfunction may seem to be caused by a faulty motor, but it can be corrected by tightening the pulleys and adjusting the belt. For this reason, always check the belts and pulleys before working on the motor.

In most cases, motor malfunctions should be handled by a professional; do not try to fix the motor yourself. If the motor is a universal model, however, you can change worn carbon brushes when sparking occurs, as detailed in How to Repair Appliances. To save yourself the expense of a service call, remove the motor from the washer and take it to a professional service person, then reinstall the repaired or new motor yourself. To access the motor, remove the back panel of the washer. The motor is mounted on an adjustable bracket.

As you can see, washing machines are complicated appliances with lots of moving parts. However, washers typically last around 12 years, which is not too shabby [source: Appliance.net]. With the troubleshooting tips in this article, you should be able to squeeze a few more years out of your machine and get cranking out loads of clean laundry in no time.


COVERAGE LOCATIONS FOR REPAIR SERVICES IN MOMBASA & NAIROBI

St Michael RdArea 546487Adams ArcadeJKIA airportAmboseli Lavingtonathi river areaayany estatebalozi estatebarton estateBomas of KenyaBrookhouseBrooksideBuruburu centerchai roadChiromoDagorettiDeloitteDennis PrittDennis Pritt RoadDonholmDouble Tree EstateeastleighBanana Hilleastleigh Nairobiembul bulembulbulestateFedha EstateGachieGaleriaGalot EstateGardengarden cityFive Star MeadowsGigirigitangaGithungurigithuraiGithurai 44GreenspanGroganville EstateGwengwa GardensHamza Estateforest roadHighridgeHighriseHilton hotelHurlinghamImara DaimaJerusalem EstateIndustrial areaIsinyaJacaranda Estatejames gichuru roadJamhuri EstateJKIAJogoo RoadJujajuja roadjunctionk southKabasiran LaneKabeteKabiriakahawakahawa sukariKahawa WendaniKahawa WestkalimoniKoma RockkitisuruKinoo 87KiserianKinookitengelaKanjeruKangemiKarbasiran LaneKaren areakaren hardykaren kabwagikariobangikariobangi southKilimaniKileleshwaKimendeKiandakiberaKikuyukaruraKasaranikiambu RdKiambu Areakeraraponkenya israelkenyakayolekenolKawangwareKomarocklad broke groveLand Mawelandmawelangatalangata roadLavington AreaLenanaKariobangi Light IndustryLimuru AreaMakongenimakadaramajengo areamachakos junctionmadarakaMachakosLumumba DriveLower kabeteLoreshoLimuru RoadQuickmart mallmaringoMaruruimatasiaMaziwamiremamlolongoMombasa CityMombasa RoadMountain ViewMuchathaMumwe Oak SchoolMurangamusa gitauMuthaigaMwikiMuthangariMuthigaMwihokomwimutoNairobi CityNairobi Kenyanairobi cbdNairobi SchoolNairobi Southnaivasha roadNakumattnakuruNear MeNew LoreshongaraNgong AreaNgong RoadngumonhcNjirunsaNyarinyayoNyayo EstateObungaOthaya RoadOtiendePanganiPark PlaceParklandsPeponi RoadpipelineQuick MartKiambu Roadrace-courseracecourseRaphta RoadRedhillRegenRiara RoadRiara SpringsRirutaRidgewaysRiversideRosslynRoysambuRuaiRuakaRuiruRundaRunda MhasibuRungirisafari parksandtonsantonSatellitesigiriaSouth CSouth BSouthern BypassSpring ValleystrathmoresyokimauTasiaThigiriThikaThika RoadThogotoThompson EstateThoome estateumoja 1umoja 2trmtwo riversumojaUNEPupper hillUpper kabeteutawalaOuter Ring RoadUthiru vetvihiga roadWaiyaki WayWangigeWanyeWestgateWestlandswoodley estateYaya CenterZambeziZimmermanTappanThermadorTraulsenVikingWelbiltWhirlpoolWolfLennoxRheemTraneRuudYorkLavingtonKarenNgongAthi RiverThikaKiambuLimuruWestlandsEmbakasiNairobiShimo La TewaUtangeBomboluluMiritiniMto PangaBarshebaMshomoroniMajengoKisauniShanzuChangamweMikindaniMagongoGanjoniKibokoniKizingoTudorPort ReitzBamburiMalindiSamburuMariakaniUkundaDianiLikoniMtongweNyaliKongoweaTononokaMtwapaMombasa

BRANDS OF WASHING MACHINE, COOKER, OVEN, DISHWASHER, FRIDGE, WATER DISPENSER, AND APPLIANCES WE FIX IN MOMBASA & NAIROBI

CANDYHPARISTONBAUKNECHTELBAKITCHENAIDNEFFIKEAHOOVERVON HOTPOINTINDESITBRUHMSIEMENSELECTOROLUXGERAMTONSSMEGBEKOARMCOBUSHSANYOHitachiHKCHuaweiInsigniaLoeweMedionLeEcoMotorolaOK.OnePlusPanasonicPhilipsRCAJVCSceptreSharpSkyworthSonyTCLTelefunkenThomsonToshibaVestelVizioNokiaXiaomiEngelNevirTD SystemsHyundaiStrongRealmeOppoMetzAsusAmazonCocotecNilaitBang & OlufsenContinentalEdisonDenverEdenwoodBlueHisenseASKOGrundigDacorElectroluxGaggenauFisher & PaykelDCSEquatorHaierJenn-AirKenmoreHobartHotpointMarvelMaytagMagic ChefNorcoldRoperSub-zeroThermadorTraulsenVikingWelbiltTappanWolfFurnace & HVACAmerican StandardAmanaBryantCarrierColemanGeneral ElectricHeilGoodmanLennoxRheemTraneRuudYorkZanussiMikaMieleFrigidaireKitchenaidWhirlpoolDaewooSamsungBosch RepairLG