Category Articles: Washing Machine Services

Appliance Repair in Mombasa

Mombasa and Nairobi Kenya Appliance Repair For all Brands

Appliance Repair in Mombasa : Mombasa and Nairobi Kenya’s premier appliance repair services for Washing Machine Repair, Cooker Repair, Ovens, Dishwasher Repair, Tumble Dryer Repair, Oven Repair, Fridge, Refrigerator, Air conditioners, cooling systems and cold room installation, repair and maintenance.

Get parts and spares at the best rates in Mombasa and Nairobi Kenya , and Nairobi Kenya. With over 10 years experience in the market, you can never gowrong with us. Looking for Appliance Repair Services “Near Me” ? if you find yourself here, make a point to call 0725414578, inquire about how we can help with your appliance. You sure will be impressed by our assistance. We work Fix residential home appliances, appliances in Hotels, Schools and businesses in Mombasa and Nairobi Counties.

Top Appliance Repair Services in Mombasa and Nairobi Kenya

Mombasa’s premier appliance repair services for Washing Machine Repair, Cooker Repair, Ovens, Dishwasher Repair, Tumble Dryer Repair, Oven Repair, Fridge, Refrigerator, Air conditioners, cooling systems and cold room installation, repair and maintenance. Get parts and spares at the best rates in Mombasa, and Nairobi Kenya.
With over 10 years experience in the market, you can never gowrong with us. Looking for Appliance Repair Services “Near Me“ ? if you find yourself here, make a point to call 0725414578, inquire about how we can help with your appliance. You sure will be impressed by our assistance. We work Fix residential home appliances, appliances in Hotels, Schools and businesses in Mombasa and Nairobi Counties.

Our Facebook Page

1. WASHING MACHINE REPAIR IN Mombasa and Nairobi Kenya

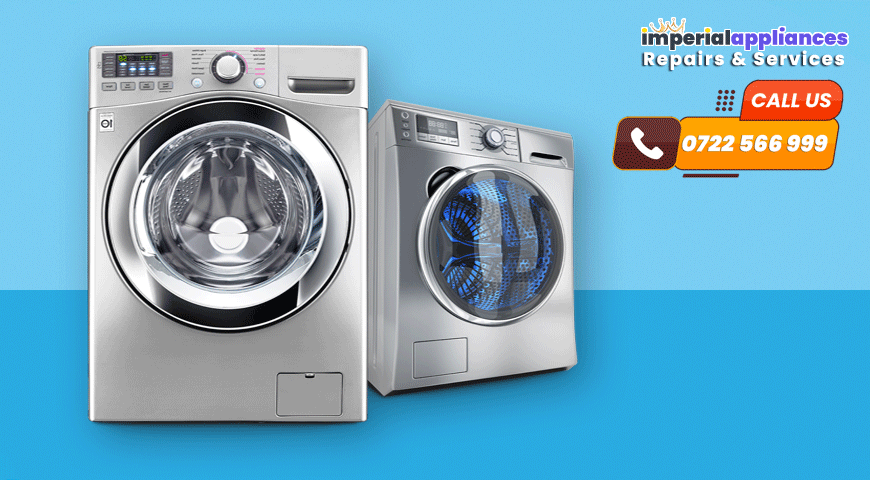
Washing Machine Repair in Mombasa, Washing Machine Parts and spares, Washing Machine installation, Washing Machine Maintenance Services. Repair services for all washer brands including Bosch, Samsung, LG, Whirlpool, Mika, Miele and more, in Mombasa County and Nairobi Kenya

2. FRIDGE REPAIR IN Mombasa and Nairobi Kenya

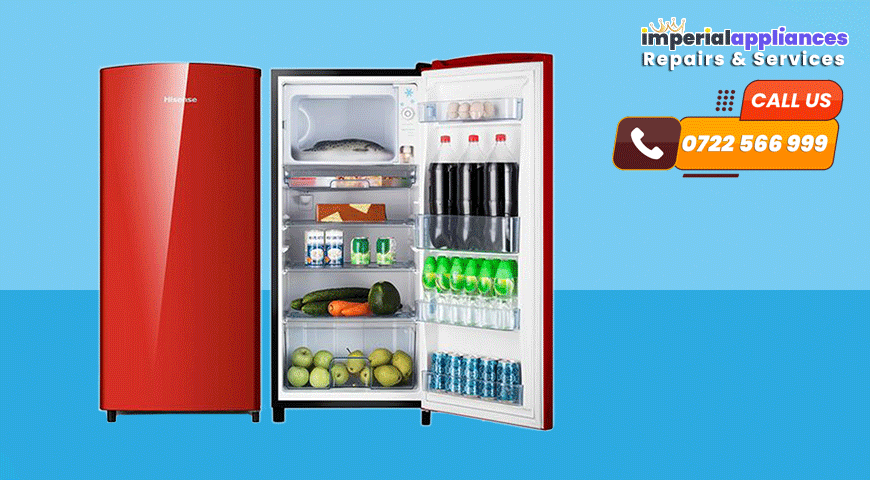
Refrigerator Repair in Mombasa, Refrigerator Parts and spares, Refrigerator installation, Refrigerator Maintenance Services. Defrosting, Gas Refilling / Refrigerant Recharging, Repair services for all Fridge brands including Bosch, Samsung, LG, Whirlpool, Mika, Miele and more, in Mombasa County and Nairobi Kenya.

3. WATER DISPENSER REPAIR IN Mombasa and Nairobi Kenya

Water Dispenser Repair Services in Mombasa, Water Dispenser parts and spairs, Water dispenser services and maintenance, water dispenser problem diagnosis : Leaking, Smelly water, not heating, not cooling, dispenser refrigerant, dispenser taps and coils replacement in Mombasa Kenya. Call Mombasa Appliances Repair on 0725414579 for the best water dispenser repair and appliance repair services.

4. COOKER REPAIR IN Mombasa and Nairobi Kenya

Cooker Repair and Oven Repair in Mombasa, Microwave Oven Parts and spares, Inbuilt Oven installation, Electric Oven Maintenance Services. Repair services for all Ovens and Cooker brands including Kitchenaid, Bosch, Samsung, LG, Whirlpool, Mika, Miele and more, in Mombasa County and Nairobi Kenya

5. DISHWASHER REPAIR IN Mombasa and Nairobi Kenya

Dishwasher Repair in Mombasa, Dishwasher Parts and spares like motors, valves and sensors, Dishwasher installation, Refrigerator Maintenance Services. Dishwasher Services, Repair services for all Dishwasher brands including Bosch, Samsung, LG, Whirlpool, Mika, Miele and more, in Mombasa County

6. AIR CONDITIONER REPAIR IN Mombasa and Nairobi Kenya

Air Conditioner Repair in Mombasa, Air Conditioner Parts and spares, Inbuilt Air Conditioner installation, Air Conditioner Maintenance Services. Repair services for all Air Conditioner types for homes, hotels, schools, offices, warehouses, stores,  and more, in Mombasa County and Nairobi Kenya

7. COOLING SYSTEMS & REFRIGERATION REPAIR IN Mombasa and Nairobi Kenya

Cooling systems and refrigeration engineers and services in Mombasa. Cold Rooms, Shopping Mall Freezers, and refrigeration. Installation, maintenancee, repairs, parts and spares, accessories in Mombasa Kenya. Call Mombasa Appliances for inquiries and services, get a cooling systems engineer at your service

8. COLDROOM REPAIR IN Mombasa and Nairobi Kenya

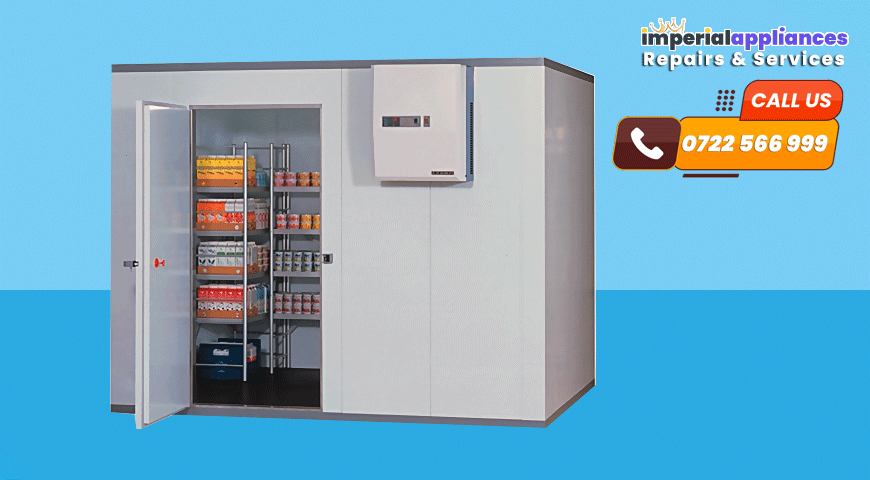
Coldroom Installation, Cooldroom Maintenance, Coldroom parts, coldroom repair, coldroom services in Mombasa and Nairobi, Kenya.

9. OVEN REPAIR IN Mombasa and Nairobi Kenya

Oven Repair in Mombasa, Microwave Oven Parts and spares, Inbuilt Oven installation, Electric Oven Maintenance Services. Repair services for all Ovens and Cooker brands including Kitchenaid, Bosch, Samsung, LG, Whirlpool, Mika, Miele and more, in Mombasa County and Nairobi Kenya

Cooker Repair and Oven Repair in Mombasa, Microwave Oven Parts and spares, Inbuilt Oven installation, Electric Oven Maintenance Services. Repair services for all Ovens and Cooker brands including Kitchenaid, Bosch, Samsung, LG, Whirlpool, Mika, Miele and more, in Mombasa County and Nairobi Kenya


CALL US FOR APPLIANCE REPAIR SERVICES IN MOMBASA AND NAIROBI KENYA

Call Mombasa Appliances Repair for Washing Machine Repair, Cooker Repair, Oven Repair, Refrigerator Repair, Dryer Repair, Water Dispenser Repair, Air Conditioner Repair, Cooling Systems, Cold Rooms, Microwave Oven Repair, Dishwasher Repair and more. Have you been looking for the best appliances Repair “Near Me” to get here ? Welcome home. Here, you can find the best appliance repair and maintenance technicians and engineers at your service on call. Dial 0725414578 to Inquire and request about our appliances installation, repair, maintenance and repair services. The Best Appliance Repair Services in Mombasa for all appliance brands and models

Coldrooms Installation & Repairs

Mombasa Appliances Repair Cold Rooms

We need cold rooms to store perishable products, especially food, for a long time. Choosing the right equipment is very important for cold rooms. Mombasa Appliances Repair provides customized cold rooms according to customer requests and needs.

Adjustable dimensions.
Easy installation and assembly.
80 mm – 150 mm panel thickness options.
42 kg/m³ density polyurethane insulation.
Internal and external surface designed in accordance to hygiene standards.
Can be used health and food sector.
Advanced temperature management.
Ecological and sustainable choice.
Walk-In Chiller (Chiller Room) and Walk-In Freezer (Freezer Room) options.

Mombasa Appliances Repair Cold Room Solutions
We are specialists in the design and installation of chiller room and freezer rooms. Our experts are available to guide you through each stage of the process from the initial consultation through to the design and then the final installation. This ensures that the cold room you have specified meets with your expectations and requirements.

Walk-in Freezer – Freezer Room
Frozen products should be stored in freezer room in order to keep them intact for a long time. The temperature of these rooms is generally -18°C. It is called Walk-in Freezer or Freezer Room.

Temperature : -18°C / -20°C

Suitability : Frozen Foods, Meat, Chicken, Fish, Ice Cream etc.

Dimensions : Custom sizes according to customer requests.

Panels : PUR or PIR

Walk-in Chiller – Chiller Room
In order for the products to preserve their freshness for a long time, they should be stored in a chiller room. The temperature of chiller rooms is usually + 2°C. It is called Walk-in Chiller or Chiller Room.

Temperature : +2°C

Suitability : Fruits, Vegetables, Legumes, Milk, Dairy, Fruit Juices etc.

Dimensions : Custom sizes according to customer requests.

Panels : PUR or PIR


Walk-in Blast Freezer – Blast Freezer Room
It is used for shocking to preserve foods for a longer period of time. The temperature of the blast freezer rooms is generally -40°C. It is especially used for perishable foods. Meat, chicken, fish etc. It is called Walk-in Blast Freezer or Blast Freezer Room.

Temperature : -40°C

Suitability : Meat, Chicken, Fish etc.

Dimensions : Custom sizes according to customer requests.

Panels : PUR or PIR

Design & Consultation
At Mombasa Appliances Repair Services, we consider the needs of the customer to be of the highest importance and we aim to provide guidance to customers from the early stages of planning and will continue to work closely with you throughout the design process to make sure you achieve a satisfactory end result. We offer an initial consultation, with design advice, CAD drawings and a full quotation as part of the project package.


Cold Room Refrigeration Units
Produced in conformity with cold room and freezer room conditions.It conforms to European Union norms and manufactured with CE marking.

Cold Room Doors
Door preference is very important for cold rooms. We are here to suggest the most suitable door to you based on customer needs and room features.

Door Types:

• Hinged Cold Room Doors
• Sliding Cold Room Doors
• Service Doors
• Monorail Doors
• Controlled Atmosphere Doors

Our products are produced in conformity with cold room (walk in chiller)and freezer room (walk in freezer) conditions.It conforms to European Union norms and manufactured with CE marking.

Cold Room Panels
Cold room panels are made of 42 kg/m³ (± 2) Polyurethane. They have also a B2 non-flammable standard under TS EN 13501-1. Panels are connected in a puzzle form. Afterwards they can also be demounted. Wall and ceiling cold room panels are produced in different thicknesses (60 mm, 80 mm, 100 mm, 120 mm, 150 mm, 180 mm, 200 mm). They are 100-120 cm wide and can be manufactured according to your instructions optional long. With the purpose of use, wall and ceiling panel steel sheets can be manufactured with Cr-Ni, PVC, Galvanize and Polyester. Cold room panels are smooth, hygienic and are easily cleanable. As they are hygienic, they are commonly used in hospitals, in grocery storehouses and in medicament branches. Panels prevent the heat loss with its individual design and accessories.

* Optionally, It can be produced as camlock cold room panel.


Cold Room Shelves
Ventilation Efficiency Over 85%
Air flow; cooling, heating, dust, bacteria, removal, drying can easily perform tasks such as. It is the most suitable system especially in cold rooms.

Can See All Products
All rack products can be easily observed. Because the light of the environment does not interfere, the light is illuminated.

More Effective in Fire Extinguishing Systems
Existing fire systems in the neighborhood (CO2, springs, etc.) can interfere with the fire more effectively and timely.


Cold Room Accessories
We supply all necessary equipment for cold rooms.

PVC Curtain
Led Lighting Systems
Pressure Compensating Valve
Cold Room Accessories (U,interior,exterior, hygenic and ceiling accessories etc.)
Environmentally Friendly
Certified Products
Does not contain carcinogenic material
Can be used in health and food sector


Heating and Cooling System Basics


Most of us take heating and cooling for granted. We expect our heating systems to keep us warm during the winter, and we depend on air-conditioning to keep us cool during the summer.

When the house is cold in winter or hot in summer, the natural reaction is to call for professional service. Fortunately, there is an alternative. You can cut service costs drastically and keep your heating and cooling systems working efficiently by doing some maintenance and quick fixes yourself. But first, it’s important to know how the basics of how heating and cooling systems function.


How Heating and Cooling Systems Work
All climate-control devices or systems have three basic components: a source of warmed or cooled air, a means of distributing the air to the rooms being heated or cooled, and a control used to regulate the system (e.g., thermostat). The sources of warm air, such as a furnace, and cool air, such as an air conditioner, in a house often use the same distribution and control systems. If your house has central air conditioning, cool air probably flows through the same ducts that heat does and is regulated by the same thermostat. When a heating or cooling system malfunctions, any of these three basic components may be causing the problem.

Both heating and air conditioning work on the principle that heat always moves from a warm object to a cooler one, just as water flows from a higher to a lower level. Furnaces and heaters put heat into the air to make your home warmer; air conditioners remove heat to make your home cooler.

All heating and cooling units burn fuel. Air conditioners use electricity. Most home heating systems use gas or fuel oil; other systems use electricity. The heat pump — an electrically powered climate control unit — both heats and cools air. In summer it extracts heat from the air inside your home. In winter it pulls heat from the air outside and uses this heat to warm the air inside.

When the furnace is turned on, it consumes the fuel that powers it, whether it be gas, oil, or electricity. As fuel is burned, heat is produced and channeled to the living areas of your home through ducts, pipes, or wires and then is blown out of registers, radiators, or heating panels. Older systems use the heat they produce to heat water, which in turn heats the air in your home. These systems use a boiler to store and heat the water supply, which is then circulated as hot water through pipes embedded in the wall, floor, or ceiling.

When an air conditioner is turned on, electrical power is used to cool a gas in a coil to its liquid state. Warm air in your home is cooled by contact with the cooling coil, and this cooled air is channeled to the rooms of your home through ducts and out registers or — in the case of room air conditioners — directly from the unit itself.

In the next section, we’ll review the different distribution systems used for heating and cooling the home.


Heating and Cooling Distribution Systems


Once air is warmed or cooled at the heat/cold source, it must be distributed to the various rooms of your home. This can be accomplished with the forced-air, gravity, or radiant systems explained below.

Forced-Air Systems
A forced-air system distributes the heat produced by the furnace or the coolness produced by a central air conditioner through an electrically powered fan, called a blower, which forces the air through a system of metal ducts to the rooms in your home. As the warm air from the furnace flows into the rooms, colder air in the rooms flows down through another set of ducts, called the cold air return system, to the furnace to be warmed. This system is adjustable: You can increase or decrease the amount of air flowing through your home. Central air conditioning systems use the same forced-air system, including the blower, to distribute cool air to the rooms and to bring warmer air back to be cooled.

Problems with forced-air systems usually involve blower malfunctions. The blower may also be noisy, and it adds the cost of electrical power to the cost of furnace fuel. But because it employs a blower, a forced-air system is an effective way to channel airborne heat or cool air throughout a house.

Gravity Systems
Gravity systems are based on the principle that hot air rises and cold air sinks. Gravity systems, therefore, cannot be used to distribute cool air from an air conditioner. In a gravity system, the furnace is located near or below the floor. The warmed air rises and flows through ducts to registers in the floor throughout the house. If the furnace is located on the main floor of the house, the heat registers are usually positioned high on the walls because the registers must always be higher than the furnace. The warmed air rises toward the ceiling. As the air cools, it sinks, enters the return air ducts, and flows back to the furnace to be reheated.


Another basic distribution system for heating is the radiant system. The heat source is usually hot water, which is heated by the furnace and circulated through pipes embedded in the wall, floor, or ceiling.

Radiant Systems
Radiant systems function by warming the walls, floors, or ceilings of rooms or, more commonly, by warming radiators in the rooms. These objects then warm the air in the room. Some systems use electric heating panels to generate heat, which is radiated into rooms. Like gravity wall heaters, these panels are usually installed in warm climates or where electricity is relatively inexpensive. Radiant systems cannot be used to distribute cool air from an air conditioner.

Radiators and convectors, the most common means of radiant heat distribution in older homes, are used with hot water heating systems. These systems may depend on gravity or on a circulator pump to circulate heated water from the boiler to the radiators or convectors. A system that uses a pump, or circulator, is called a hydronic system.


Modern radiant heating systems are often built into houses constructed on a concrete slab foundation. A network of hot water pipes is laid under the surface of the concrete slab. When the concrete is warmed by the pipes, it warms the air that contacts the floor surface. The slab need not get very hot; it will eventually contact and heat the air throughout the house.

Radiant systems — especially when they depend on gravity — are prone to several problems. The pipes used to distribute the heated water can become clogged with mineral deposits or become slanted at the wrong angle. The boiler in which water is heated at the heat source may also malfunction. Hot water systems are seldom installed in new homes.

In the next section, learn how the thermostat and other controls are used to maintain the indoor climate created by your heating and cooling systems.

Controls for Heating and Cooling Systems
The thermostat, a heat-sensitive switch, is the basic control that regulates the temperature of your home.

It responds to changes in the temperature of the air where it is located and turns the furnace or air conditioner on or off as needed to maintain the temperature at a set level, called the set point. The key component of the thermostat is a bimetallic element that expands or contracts as the temperature increases or decreases in a house.

Older thermostats have two exposed contacts. As the temperature drops, a bimetallic strip bends, making first one electrical contact and then another. The system is fully activated when the second contact closes, turning on the heating system and the anticipator on the thermostat. The anticipator heats the bimetallic element, causing it to bend and break the second electrical contact. The first contact is not yet broken, however, and the heater keeps running until the temperature rises above the setting on the thermostat.

More modern thermostats have coiled bimetallic strip elements, and the contacts are sealed behind glass to protect them from dirt. As the temperature drops, the bimetallic elements start to uncoil. The force exerted by the uncoiling of the elements separates a stationary steel bar from a magnet at the end of the coil. The magnet comes down close to the glass-enclosed contact, pulls up on the contact arm inside the tube, and causes the contacts to close, completing the electrical circuit and turning on the heater and the anticipator. As the air in the room heats up, the coil starts to rewind and breaks the hold of the magnet on the contact arm. The arm drops, breaks the circuit, and turns off the system. As this point, the magnet moves back up to the stationary bar, keeping the contacts open and the heater turned off until the room cools down again.

The latest heat and air-conditioning controls use solid-state electronics for controlling the air temperature. They are typically more accurate and more responsive than older systems. However, repair to solid-state controls usually means replacement.

Understanding how the heating and cooling systems function in your home will help you head off problems before they become too serious.


Dishwasher Repair

Dishwasher Repair in Mombasa

Dishwasher Repair in Mombasa – The control panels on the latest dishwashers can look intimidating. They’re loaded with so many dials, push buttons, and other features that the machine looks too complex to repair. This is actually not the case.

With the exception of the control panel, dishwashers haven’t changed much in basic design over the last two decades. You can repair most dishwasher malfunctions yourself, and we’ll discuss tips for do-it-yourself service and maintenance in this article.

Dishwasher parts can be replaced as a unit, which is often easier and less expensive than having a professional service person make repairs. If you aren’t sure a part is still usable, remove it from the dishwasher and take it to a professional for testing. You can then decide whether to buy a new part or have the old one repaired on the basis of the repair estimate.

­Dishwashers usually run on 115-volt or 120-volt power. The water they use comes directly from the water heater, and wastewater is drained into the sink’s drainpipe. The dishwasher is not connected to the cold-water supply.

For best dishwashing results, set the temperature control of the water heater to no less than 140 degrees Farenheit. Water cooler than this usually doesn’t get the dishes clean, unless your dishwasher is a newer model that preheats incoming water. The water shutoff for the dishwasher is typically located below the adjoining sink.

Caution: Because the dishwasher is connected to both the plumbing system and the electrical system, you must consider both systems when working on this appliance.

Before doing any work on the dishwasher, make sure the unit is unplugged or the power to the unit is turned off, and remove the fuse or trip the circuit breaker that controls the circuit at the main entrance panel or at a separate panel. Shut off the water supply to the dishwasher at the shutoff in the basement or crawl space under the kitchen.

Here are some operating checks you can make if the dishwasher does not work:

Step 1: Check to make sure it’s receiving power. If the unit plugs into a wall outlet, check the cord, the plug, and the outlet to make sure they’re functioning properly. Also check the switch that controls the outlet to make sure it’s turned on. Most built-in dishwashers are wired directly into a circuit.

Check the main entrance panel for a blown fuse or tripped circuit breaker, and restore the circuit. If your home is an older one, the dishwasher may be wired to a separate entrance panel; look for a blown fuse or breaker at this panel, and restore the circuit.

Step 2: If the circuit is receiving power, and the wall outlet is controlled by a switch, the switch may be faulty. Test the switch with a voltage tester.

Take off the switch cover plate and place one probe of the tester on one terminal and the other probe on the other terminal. If the tester bulb lights, the switch is functioning. If it doesn’t light, the switch is faulty. Replace the switch with a new one of the same type.

Step 3: Make sure the door is tightly closed and latched. The dishwasher will not operate until the latch is properly engaged. To check the latch, close and latch the door, holding the latch tightly in place. Then, still pressing the latch closed, turn the control knob to the ON position. If the dishwasher works, the latch is faulty and should be cleaned, tightened, or replaced.

Step 4: Make sure the water is turned on and the water temperature is high enough. A breakdown in the water heater could stop flow of water to the dishwasher. Test the hot water in the kitchen sink or bathroom. If you can draw hot water, the water heater may not be at fault.

Step 5: Make sure the controls on the control panel are properly set. The newer push-button controls can be very sensitive; make sure the buttons are firmly pressed into position.

If you’ve gone through these five checks without finding the solution, it’s time to dig deeper into the dishwasher.


Disassembling the Dishwasher

Access to the working parts of most dishwashers is through the front door of the unit. Many repairs can be made to the machine by simply opening the door and reaching into the various component parts, such as the sprayers, strainers, float switch, racks, and door latch.

To get to the control panel on the door, remove a series of retaining screws around the panel. These screws may be under molding trim strips, which usually snap onto the metal housing. Pry off the strips with a stiff-bladed putty knife or a screwdriver, or remove a setscrew that holds the molding. The control knobs are friction-fit on shafts or are held by small setscrews in the base of the knobs. In some dishwashers, the entire front door panel must be removed to gain access to the control components. This panel is held to the door by a series of retaining screws, usually found around the edge on the inside back of the door.

On many models, once the control panel is removed the door panel can be removed by unscrewing a series of fasteners holding the door panel in place. Sometimes these retaining screws are covered by trim moldings, which must be pried or slipped off. For access to the motor, pump, hoses, inlet valves, and other parts, remove the lower access panel. This can usually be done without removing the entire door. The panel may be held by retaining screws, or it may lift up and off metal hangers.

If the dishwasher is portable, tip the machine over on its back or side before removing the control door or lower access panels. This may give you a more comfortable working position.

Once you can get inside the dishwasher, knowing the major parts and how they function will help you assess the problem. We’ll review the main parts and how to check them in the next section.


Door and Switch Repairs

When your dishwasher isn’t working properly, you should check several main components, such as the door gasket, door latch, switches, and timer.

Replacing the Door Gasket
If water leaks through the dishwasher door, the gasket is probably faulty. Open the door and examine the gasket. It should be soft and resilient. If it’s worn, cracked, or hard, it should be replaced.

Once the gasket is in place, check it for fit against the door frame. It should fit tightly with no cracks or bulges between the gasket and the frame. If necessary, tighten or loosen the retaining screws, or refit the gasket in the clips or the door channel. Then run the machine through a washing sequence and check for leaks.

If you spot a leak, and the gasket seems to be properly in place, try adjusting the door latch. The trick is to position the gasket against the frame of the door without flattening the gasket or squeezing it too flat when the door is latched properly. Adjust the latch or the gasket until it fits snugly against the door frame.

Servicing the Door Latch
The latch on a dishwasher door is opened and closed repeatedly, and this hard use can lead to mechanical problems. The latch may be loose, or it may have slipped out of position, throwing the alignment off and preventing the door from closing properly. When this happens, the latch does not engage properly, and the dishwasher will not start.

In many cases, you may be able to solve the problem by adjusting the position of the latch. Move the latch slightly by loosening the screws that hold it. Slide the latch with your fingers or pliers; the screw slots are made especially for this purpose. Close and open the door to see whether the latch is properly aligned. Tighten the screws to hold it in the correct position.

After repositioning the latch, check to see if it’s working properly. Close and latch the door and turn the control knob to the ON position. If the dishwasher doesn’t start, the latch is faulty. Replace it with a new latch, connecting it the same way the old one was connected. You may have to move the new latch back and forth several times before it works properly.

Servicing the Door Switch
On many dishwashers, the latch engages a switch to activate the timer and other control components. If the latch is not completely engaged or if the switch is faulty, the machine will not operate. Here’s how to test and repair a door switch:

Step 1: Latch the door and hold the latch tightly in the closed position. This works best on a unit with a lever-type latch. Then turn the control to the ON position. If the unit works, the problem is probably a misaligned lock unit. Adjust the lock unit with a screwdriver. If this doesn’t solve the problem, the switch may be faulty.

Step 2: Test the switch with a volt-ohm-milliammeter (VOM) set to the RX1 scale. Remove the panel covering the door switch and remove one of the electrical lead wires of the switch from its terminals. Clip one probe of the VOM to each switch terminal and shut the dishwasher’s door. If the meter reads zero, the switch is working. If the meter reads higher than zero, the switch is faulty and should be replaced.

Step 3: Replace the switch with a new one of the same type. Connect the new switch the same way the old one was connected.

Servicing the Float Switch
Dishwashers are usually protected from overfilling by a float switch. This switch is located in the bottom of the unit. Here’s how to check and replace it:

Step 1: Open the door and remove the bottom dish rack. Check to see if the float valve is stuck. If it is, clean away food debris around the float. With a screwdriver handle, lightly tap the top of the float to free it.

Step 2: If tapping doesn’t work, remove the lower access panel and locate the bottom portion of the float and float switch. Test the float switch with a VOM set to the RX1 scale. Unscrew one electrical lead wire to the switch terminal, and clip one probe of the VOM to each terminal. If the meter reads zero, the switch is not faulty. The trouble is probably in the timer. If the meter reads higher than zero, the switch is faulty.

Step 3: Replace the switch with a new one made to fit the dishwasher. The switch is held to a mounting bracket with screws; remove the screws to get the old switch out.

Step 4: Connect the new switch the same way the old one was connected.

Servicing Timer and Control Switches
Because the timer controls many operations, a faulty timer can cause many problems. The timer is a complex component, so you shouldn’t attempt a do-it-yourself repair. Test the timer with a VOM set to the RX1 scale. To gain access to the timer, remove the front control panel. The timer is directly behind the main timer control knob. Disconnect one of the timer’s terminal wires and clip one probe of the VOM to each terminal. If the meter reads zero, the timer is working. If the meter reads higher than zero, the timer is faulty and should be replaced.

If possible, use the same procedure to test the selector and cycle switches. The wiring hookup, however, may be too complicated to figure out on either of these switches. If you aren’t sure you can deal with these switches, call a professional service person. Replace a faulty timer — or a faulty control switch — with a new one made for the dishwasher.

The timer is connected to several wires that supply power to operate the various functions of the dishwasher. To replace the timer, have a helper hold the new timer next to the old one. Connect the wires of the new timer one by one, removing the old wire and connecting the new, to make sure you connect the wires correctly. The wires may be friction-fit on the terminals. If they are, use long-nosed pliers to remove the wires. Don’t pull up on the wires, or you may break the connection between the wires and the clips.

After connecting the wires, set the new timer in position, secure it the way the old one was secured, and replace the control panel and knobs.

If your dishwasher won’t fill with water properly or isn’t drying the dishes, you most likely have a valve or heating element problem. In the next section, we’ll discuss how you can assess these types of problems.

Valve, Dispenser, and Dish Rack Repairs
Checking on and routinely maintaining the various valves, detergent dispenser, and dish rack can keep the right amount of water and cleaner working effectively in your dishwasher.

Servicing the Water Inlet Valve
The water inlet valve controls the amount of water flowing into the dishwasher. It may be activated by the timer or by a solenoid. If the dishwasher doesn’t fill with water:

Step 1: Make sure that the water supply to the unit is turned on and that there’s no problem at the water heater. A shutdown of the water heater would cause a shutdown of the water to the dishwasher.

Step 2: Check the timer to make sure it’s working through its programmed sequences. If both the water supply and the timer are in working order, the problem is probably in the inlet valve.

Step 3: Check the inlet valve located under the tub of the dishwasher. Malfunctions of the inlet valve may also occur when a screen inside the valve becomes clogged with mineral deposits. To solve this problem, pry out the screen with a screwdriver and flush it thoroughly with running water. Then replace the screens.

Step 4: If the valve is controlled by a solenoid, the solenoid is usually connected to the side of the dishwasher. Tap the solenoid and the valve lightly with the handle of a screwdriver to break it free of any obstruction. Then start the dishwasher again.

Step 5: If the dishwasher still doesn’t fill, test the solenoid with a volt-ohm-milliammeter (VOM) set to the RX1 scale. Disconnect one electrical lead to the solenoid and clip one probe of the VOM to each solenoid terminal. If the meter reads from about 100 ohms to 1,000 ohms, the solenoid is functioning. If the reading is higher than 1,000, the solenoid is faulty and should be replaced.

Step 6: If necessary, replace the solenoid with a new one of the same size and type. Connect the new solenoid the same way the old one was connected.

Badly worn or misshapen inlet valves cannot be repaired. If the valve is damaged, replace it with a new one made for the dishwasher. The valve is usually held to a mounting bracket with screws. Take apart the connection linking the valve to the water supply. Then take out screws and remove the valve. Install the new valve by making the connections in reverse order.

Servicing Drain Valves
Some dishwashers have drain valves. These valves are used only in dishwashers with nonreversible motors. When the drain valve malfunctions, call a professional service person.

Servicing the Heating Element
The heating element is used to help dry the dishes. In most dishwashers, the heating element fits around the screen in the bottom of the tub housing; it looks like an electric oven element. The heating element doesn’t malfunction often, but it can burn out. If you suspect a faulty element:

Step 1: Test it with a VOM set to the RX1 scale. Remove the dishwasher’s bottom access panel and disconnect one of the power leads to the element. Clip one probe of the VOM to each element terminal. If the meter reads between 15 and 30 ohms, the element is working. If the reading is higher than 30 ohms, the element is faulty and should be replaced.

Step 2: As needed, replace the heating element with a new one made for the dishwasher. Disconnect the electrical leads to the element’s terminal screws and remove the nuts or other fasteners that hold the element to the terminals. From inside the tub, lift the element out. It may be held by clips and ceramic blocks in the tub, but you can easily thread it past these spacers. Set the new heating element in position, reconnect the power leads, and replace the fasteners that hold the element in place.

Servicing the Detergent Dispenser
Accumulated detergent from prior washings can cause problems with the soap dispenser. Buildup can get into the soap dispenser and interfere with the spring that triggers the flip-out tray, or it can slow down the pivot action of the tray. If the dispenser is not opening, first make sure you aren’t loading the machine so dishes or pots and pans are touching the dispenser, and that dish racks aren’t blocking the dispenser. Also check to make sure the dispenser tray isn’t cracked. If leftover detergent in the tray is almost liquid, rather than just damp, the tray may be damaged.

If you can’t solve the problem easily, replace the entire dispenser unit. This is usually easier than trying to disassemble it and replace separate parts. Use a new dispenser made for the dishwasher. The screws holding the dispenser in place may be on the front of the unit, or you may have to remove the front door panel to get to the screws and make the replacement. Remove the old dispenser and secure the new one, connecting it in the same way the old unit was attached.Troubleshooting Dish Racks

Problems with the dish racks usually occur because the racks have been jammed back into the tub housing after they’re fully loaded. Careless handling can exert enough force to crack or break the roller wheels or throw the racks off the tracks. The solution is easy: Stop jamming the racks.

The repair is easy, too. Remove the racks by pulling out the tiny metal pins that hold them in the tracks. Or simply lift up on the racks and pull them out of the tracks. Then reinstall the racks on the tracks so that they roll smoothly. If the rollers are cracked or broken, replace them with new ones of the same type. The rollers may be friction-fit to their hubs. Pull them off for replacement. Or, if they are held by tiny spring clips, pull the clips out with pliers, or pry them out with the tip of a screwdriver. If you can’t pull the rollers off for replacement, remove and replace the entire rack.

A noisy wash cycle or water that won’t drain are problems that, for the most part, can be handled yourself. We’ll discuss how you can pinpoint these water-related problems in the next section.

Motor and Water-Related Repairs

Keeping the dishwasher’s sprayer arms, strainers, and water pump clean will help deter problems before they begin. Here’s how to check on these important features.

Cleaning Sprayer Arms
The sprayer arms seldom cause any trouble, but sometimes the spray holes in the arms become encrusted with detergent or minerals. When this happens, the holes must be cleaned out so that the arms will work efficiently. Remove the lower arm by twisting off the cap that holds it to the motor shaft. Wash it thoroughly with water and mild household detergent. Sharpen a lead pencil and break off the lead point. Use the tapered end of the pencil to ream out the holes. A wood manicure stick can also be used.

Do not use toothpicks, matches, or metal objects for this job. Lightweight wooden sticks could break off in the ports, causing blockage; metal could scrape and enlarge the ports. After cleaning, place the sprayer arm back on the motor shaft and twist the cap back on to hold it in place. Follow the same procedure to clean the upper sprayer arm.

Removing and Cleaning the Strainer
The strainer is located directly under the lower sprayer arm. When the strainer becomes clogged with food and detergent debris, the dishwasher may flood or overfill. On some dishwashers, the strainer is a plastic or metal component consisting of two semicircular halves. To remove this type of strainer, pry it up. On other dishwashers, the strainer is a one-piece component. To remove this type, remove the cap that holds the sprayer arm on its shaft. Then remove the sprayer arm and the strainer.

Wash the strainer in the kitchen sink with water and a mild household detergent. Use a fairly stiff brush to get all the debris out of the holes and slots in the strainer. Rinse the strainer well and replace it. If part of the strainer lifts out for regular cleaning, check it and clean it — if necessary — after each load of dishes is washed.

Troubleshooting Leaks
If the dishwasher leaks, and you know the problem is not related to tub overfilling, the pump, or inlet valve problems, the plumbing connections may be faulty. Most dishwashers are connected to the water supply with metal pipe fittings, and the leak could be at these fittings. If the fittings are threaded, tighten them with an adjustable wrench. If this doesn’t work, chances are the threads are stripped or the fitting is cracked or otherwise damaged. In this case, replace the fitting.

Most dishwashers discharge used water through a pipe or a hose connected to the drain or garbage disposer under the kitchen sink. If the drain line is made of flexible hosing, it may have cracked from prolonged exposure to hot water. Examine the hose; if it’s damaged, replace it. If the hose is leaking at its connections with the disposer or dishwasher, tighten the fittings or clamps at the connections, or replace the clamps. Also check for water leaks around inlet valves, drain valves, and anywhere you see flexible hoses and hose connections. Leaks at clamps can be stopped by tightening or replacing the clamps. Leaks in hoses can be eliminated by replacing the hoses.


Servicing the Water Pump


In most dishwashers, the water pump is located under the lower sprayer arm. This component pumps the water through the dishwasher. The pump has two impellers, top and bottom. These, as well as other components, can become clogged with food or detergent. Here’s how to disassemble the pump:

Step 1: Remove the cap that holds the sprayer arm on.

Step 2: Remove the sprayer arm, the screen, the pump housing, a bolt, the upper impeller, the food disposer blade, a spacer plate, the impeller hood, a flat plate, an O-ring, and the lower impeller. Lay the parts out in order as you disassemble them so that you’ll be able to reassemble them properly.

Step 3: Clean the parts thoroughly with a mild detergent solution. If any parts are worn, replace them with new ones made for the dishwasher.

Step 4: Replace any seals, such as the O-ring or other washers, with new ones.

Step 5: Reassemble the pump, keeping the parts in order.

To reach the water pump, remove the sprayer arm and screen and then the pump housing. Remove the bolt, and the pump components can be disassembled.

On some dishwashers, the lower impeller serves as a drain pump. This type of system usually has a reversible motor; machines with nonreversible motors have drain valves, as detailed previously. If your machine possesses this impeller pump system, and the water will not drain from the dishwasher, clean the lower pump impeller. This may solve the problem. Otherwise, call a professional service person.

Repairing the Motor
If the dishwasher motor malfunctions, don’t try to fix it yourself. Call a professional service person to make repairs or replace the motor. Before you call for service, however, you should check to make sure that the timer is working and that the dishwasher is receiving power.

Don’t let water leaks, a noisy cycle, soap spots, or other problems keep you from using your dishwasher. Most problems can be handled yourself if you follow the guidelines mentioned in this article.



Washing Machine Repair in Mombasa and Nairobi

Washing Machine Repair in Mombasa

Washing Machine Repair : It’s laundry day. You know this because the shirt you’re wearing is eight years old and doesn’t match your pants in any light. And there’s a chance, just a chance, that you’re wearing one black sock and one Navy blue sock. So you schlep a heaping hamper to the laundry room and carefully (or not so carefully) separate colors from whites. Then, you cram as many as will fit into the washing machine, throw in some detergent and hit the START button.

washing machine repair in mombasa washer spare parts washing machine installation and maintenance nairobi kenya

Suddenly, the piece of machinery you could always count on is on the fritz. Washing machines are the workhorses of the household appliance stable — in fact, there’s even a TED Talk about how they’re the most important invention of the Industrial Revolution (source: Rosling]. And when they go down, they’re the toughest to get by without. Who wants to drag their laundry down the street to the laundromat and fight other people for the privilege of shoving quarters into a strange machine that you suspect may not take the gentle cycle very seriously?

So, you have a choice to make: Call a repairman or see if you can tackle the problem yourself. Because washing machines do so many things, they may be harder to diagnose than they are to repair. For a household appliance, it’s a pretty complicated gizmo – with special timing cycles that operate valves, motors that turn water on, spin the tub, drain water, and control the water temperature.


But diagnosis is possible, even for the do-it-yourselfer. It just takes a little patience and a basic understanding of washing machine mechanics. In this article, we will explain how to troubleshoot your washing machine and describe some quick repairs for common malfunctions.


As we mentioned, washing machines are complex, but there are some simple steps you can take to diagnose common washer problems.

Is the washer receiving power? The first line of defense for any electrical repair is the sincere hope that it’s as simple as a loose plug, damaged cord or malfunctioning wall outlet. If all of these check out, it could be a blown fuse or circuit breaker. Either of these can still be a pretty simple fix. But if the machine is receiving power and still not operating, then it’s probably time to get to know your washing machine on a deeper level.

After checking for power, the next thing to look at is the water supply. Knobs may get turned inadvertently or hoses could become kinked, so a quick inspection of these parts may yield an answer. Make sure that both water faucets are turned on and that all hoses are properly extended, without kinks. If the washer has a water-saver button, make sure the button is depressed.

If it’s not a power or water source issue, the next logical problem may be that the washing machine is not working properly because it needs to be cleaned. In the next section, we’ll discuss how to keep dirty clothes from creating a dirty washer.


Washing Machines Need Cleaning, Too


We interrupt this scintillating mechanical exploration of washing machine mechanics to bring up a very important matter: why your laundry might stink even after a fresh wash. It may be that your washer is dirty. Here’s how to clean a washing machine:

Regularly clean the top and door of the washer to prevent the buildup of dirt and detergent. When you wash very linty materials, pull lint from the tub after removing the laundry. Built up lint can keep water and detergent from properly circulating and soap deposits themselves may cause laundry to smell bad. To solve this problem, fill the tub with water and add 1/2 cup of baking soda or 3 cups of white vinegar; then run the machine through the complete wash cycle sans laundry [source: DIY Life]. If the deposits are really bad, wash the inside of the tub with a solution of household ammonia and mild detergent. Rinse thoroughly and wipe the tub with liquid bleach. A word of caution: Rinse the tub thoroughly before wiping it out with bleach. The combination of ammonia and bleach forms a potentially dangerous gas called chloramine. This compound can cause health issues ranging from mild skin irritation to digestive and kidney problems [source: CCAC]

Finally, run the machine through a complete wash cycle before you put any more laundry in. Hopefully, you were able to address your issue with these simple steps.

But if your problem persists, don’t despair. In the next section, we’ll discuss disassembling the washer for more thorough repairs.


A Look Under the Hood: Disassembling the Washer


For most repairs and maintenance, the washer cabinet usually requires disassembly. The washer cabinet is where the magic happens, and houses all of the electrical components of the washer. Location varies by manufacturer, but typically this can be found on the top of the machine behind the control panel. This can be relatively simple based on the make and model, but be sure to consult the owner’s manual to find out how to disassemble your particular machine properly. Caution: Make sure the power cord and water hoses are disconnected before you disassemble the cabinet or tip it over for service.

Here are three steps for basic washer disassembly:

Step 1: Removing the control panel, typically located on top of the machine, usually requires loosening and/or removing a set of retaining screws. These may be located under a piece of molding or trim that needs to be removed in order to see them. Knobs on the control panel are usually friction-fit and will pull off, while others are held by small setscrews, which do not have heads like a typical slotted screw, at the base of the knob. Loosen the setscrews with a screwdriver or Allen wrench and pull the knobs straight off the shafts.

Step 2: To remove the service panel, you also need to remove the retaining screws. First, make sure the machine and the hoses are drained of water. Tip the washer over on its front or side to gain access through the bottom of the machine, which is generally open and doesn’t have a service panel.

Step 3: To remove the top of the cabinet, insert a stiff-bladed putty knife into the joint between the top and side panels and give the knife a rap with your fist. This should release the spring clips so that the top can be removed.

Part of what makes washers so hard to repair is that they have so many control devices (components that control other functions, such as switches and timers). Now things start to get a bit more complicated, but don’t give up yet. In the next section we will walk you through servicing these slightly more sophisticated parts.


Which Switch to Fix?


Washing machines run through elaborate cycles with multiple settings, which makes them different from your typical household appliance, a toaster for instance, that may perform just one or two functions. Here’s how to repair some of the common switches and timers.

Lid Switch

The lid switch on a washer often serves as a safety switch, and if it’s not working, or if the switch opening in the lid is clogged with detergent, the machine will not run. To check and repair the lid switch:

Step 1: Unplug the machine. You can clean out the lid switch port using a wooden manicure stick or even a chopstick.

Step 2: If cleaning doesn’t help, remove the top of the cabinet to access the switch itself. With the switch exposed, check to make sure the screws have not become loose. Loose screws can cause the switch to move when the lid is closed or as the machine goes through its cycles. Check the terminals of the switch to make sure they’re tight.

Temperature Selector Switch

This control panel switch regulates the temperature of the water in the tub. It also plays a role in controlling the fill cycle. If you suspect this switch is faulty, remove it and take it to a professional service person for testing because this takes special equipment.

If there’s a problem with both water temperature and tub filling cycles, both the temperature switch and the timer may be faulty. Procedures for testing the timer can be found on the following page.

Water Level Control Switch

This is another control panel switch, usually located next to the temperature switch. There should be a small hose connected to this switch, and sometimes, this hose becomes loose and falls off the connection. When this happens, the water in the tub usually overflows. To solve this problem, cut about 1/2 inch off the end of the hose and use a push fit to reconnect it to the switch. A push fit is a simple metal fitting that fastens into place by a row of small teeth that grip the tubing. The switch itself can also malfunction, resulting in tub overflow and other water-level trouble in the tub. If you suspect this switch is faulty, remove it by backing out the screws holding it in place and take it to a professional service person for testing.

If you’ve gotten this far and your washer is still broken, don’t give up now. We’re only getting started, and your laundry isn’t going anywhere. Keep reading because in the next section we’ll discuss why it may just be bad timing.


Timer Troubles


The timer controls most of the operations of the washer: water level, tub filling and emptying, length of cycles and cycle-setting sequences. For this reason, any repairs to the timer should be made by a professional service person. However, there are a couple of checks you can make yourself when you suspect the timer is faulty.

Step 1: Unplug the washer. To access the timer, remove the control knobs and the panel that covers the controls. This is usually the same control panel we discussed earlier, but may also be accessed be through a panel at the back of the unit. Carefully examine the wires that connect the timer to the other parts of the washer. If the wires are loose or disconnected, try pushing them into position; they usually fit into their terminals like plugs. Use long-nosed pliers to push them into position in order to avoid breaking the wire connections — never pull a wire by hand.

Step 2: To test the timer, use a volt/ohm meter (VOM) set to the RX1 scale. The RX1 scale is the lowest and should be the default setting of the meter. Disconnect the power leads to the timer and clip one probe of the VOM to each lead. The VOM should read zero if the timer is working. Since the timer is a multipurpose switch, turn it through its cycle and test each pair of terminals in turn. The meter should read zero at all of these points. If one or more readings are above zero, the timer is faulty and should be replaced.

Step 3: To replace the timer, unscrew and disconnect the old one. Install a new timer made specifically for the washing machine. Disconnect the old wires one at a time, connecting each corresponding new wire as you work to make sure the connections are properly made. After all the wires are connected, check the connections again for correctness and screw the timer assembly into place.

Now we’re having some serious fun! Actually, you’re probably thinking about which is more painful, reading about laundry or actually doing it. Take heart — we’re approaching the spin cycle and you’ll be done soon.


Rub-a-Dub-Dub: Servicing the Tub and Valves


If your washer is overflowing or is excessively noisy, the tips on this page may be able to help you solve your problem.

If the washer won’t fill or fills very slowly, if it overfills, or if the water is the wrong temperature, the water inlet valves could be faulty. These components are easy to locate and very easy to replace, at little cost. When you suspect an inlet valve is broken, first check to make sure the water faucets are fully turned on and properly connected to the hot and cold inlets of the valves. Then check the screens in the valves; if they’re clogged, clean or replace them. If water doesn’t enter the tub, set the temperature control to the HOT setting. If there is no water, set the control to the WARM setting. If all that comes out is cold water, the hot-water inlet valve is not working. Reverse the procedure to test the cold-water valve, setting the control first on COLD and then on WARM. If the tub overfills, unplug the washer. If water still flows into the tub, the valve is stuck open. In any of these cases, the valves should probably be replaced.

Here’s how to check the valve assembly:

Step 1: Remove the back service panel and disconnect the hot-water and cold-water hoses to the valves.

Step 2: Remove the hoses connected to the valves inside the cabinet. Also disconnect the wires from the terminals. Back out the screws holding the valves to the machine. The inlet valves have solenoids (a coil of wire that carries a current) inside the housing.

Step 3: Tap the solenoids with a screwdriver handle. If this doesn’t work, replace the entire inlet valve assembly. Install it in the reverse order of the way you disconnected the old one.

If laundry is torn during the wash cycle, feel around the tub. If you find a rough spot, you may be able to smooth it with an emery board or light sandpaper. If this doesn’t work — or if you have to cut to bare metal to remove the roughness — the tub should be replaced. In this case, it’s probably much wiser to replace the entire washer.

You’ve probably noticed, but now we’re getting into the really sticky problems. By now, the weekend warriors have abandoned all hope and are strolling through the aisles of Home Depot. But not you. In the next section, we’ll test your mettle with more miscellaneous mechanical gobbledygook.


Agitate This: Servicing the Agitator


The agitator — the finned part that fits on the tub shaft — can also tear laundry if the fins are cracked or broken. You may be able to solve the problem temporarily by pinching off the splinters with pliers and lightly filing the plastic smooth, but this is just a stopgap measure; the agitator should be replaced. Replace a damaged agitator with a new one of the same type. To do this, unscrew the cap on top of the agitator. With the cap off, pull straight up on the agitator; it should lift off. If it doesn’t move, rap its side with a hammer. If it still won’t lift off, drive wedges under the bottom rim of the agitator to dislodge it. Then, set the new agitator into place and replace the agitator cap.

Damage to the snubber, a pad-like device sometimes located under the agitator cap, can cause the machine to vibrate excessively. The snubber may have a suspension spring in it. Lift off the agitator cap and examine the snubber. If the spring is broken, or if the pad is visibly worn, replace the entire snubber. Snubbers might also be found at the top of the tub, under the transmission, or as part of the water-pump housing. Look around until you see it.

If the machine doesn’t have a snubber, listen for noise at the suspension unit between the tub and the machine cabinet. The suspension unit has fins or pads that may need replacement. In some cases, the entire unit may have to be replaced. Another noise point is the basket support nut, which holds the basin in place. You can imagine what kind of punishment that sucker takes. Tighten the nut or, if you can’t tighten it, replace it.

Sudden tub stops can be caused by a broken motor belt, but they are usually due to poor tub loading. Check to see if wet laundry is wadded around the bottom of the tub shaft, or under the basket or agitator assembly. Remove the basket or agitator in order to remove the laundry easily.

Next, we’ll take a look at water-related problems, starting with troubleshooting water leaks.


Troubleshooting Water Leaks


Water leaks in a washer are often difficult to trace. The problem could be a loose connection, a broken hose, a cracked component or a defective seal. It could also be a hole in the tub. If that’s the culprit, it’s usually best to replace the washer.

Tightening water connections can eliminate most leaks. Here’s how to do it:

Step 1: Check the lid seal. If faulty, replace with a new gasket.

Step 2: Check the hoses at faucet connections. Tighten connections or replace hoses.

Step 3: Check the hoses at water valve connections. Tighten connections or replace hoses.

Step 4: Check the drain hoses. Tighten connections or replace hoses.

Step 5: Check the inlet nozzles. Tighten connections or replace nozzles.

Step 6: Check the splash guard. Tighten connections or replace.

Step 7: Check any plastic valve. Tighten connections or replace.

Step 8: Check the outlet hose to drain. Tighten connections or replace hose.

Step 9: Check the water pump, using the procedures that follow on the next page

Now that you’ve checked the most likely sources for a water leak, you can reasonably rule out that as the culprit. On the following pages, we will cover tips for servicing the water pump, the belts and pulleys, and the motor.


Pump Problems: Servicing the Water Pump

Of all washing machine parts, the water pump probably takes the most punishment because it’s constantly in use. When the pump fails, you can hear or see the trouble: a loud rumbling inside the machine, or a failure of the water to drain out of the tub. Here’s what you can do to fix the problem:

Step 1: Check the drain hoses to make sure they’re draining properly. Remove the water supply hoses from the back of the washer. With long-nosed pliers, extract the filter screens from the valve ports in the washer or from the hoses themselves. These screens keep debris from collecting in the hoses and can become clogged. Wash the screens thoroughly. Then, replace them and reattach the hoses. If the machine still rumbles or doesn’t drain, examine the pump.

Step 2: To access the pump, first bail and sponge out any water in the machine’s tub. Then tip the washer over on its front, using a heavy blanket or pad to protect the washer’s finish. Remove the back service panel. The pump is usually located along the bottom of the machine, but with the unit tipped on its front, it’s easier to remove the pump through the back than through the bottom of the washer.

Step 3: Locate the pump. It has two large hoses attached to it with spring or strap clips. If the clips are the spring type, pinch the ends of the clips together with pliers to release them, and slide the clips down the hoses. If the hoses are kinked or crimped at these connections, straighten them as best you can and reconnect them. Then, try the machine again to see if this kinking was causing the problem. If the machine still doesn’t drain, you’ll have to remove the water pump.

Step 4: To remove the pump, loosen the bolt that holds the drive belt taut and move the washer motor on the bracket to loosen the belt. Move the motor out of the way and unbolt the pump. As you loosen the last mounting bolt, support the pump with your hand. Then, lift the pump out of the washer.

Step 5: You should take the pump apart if you can because the trouble could be lint, dirt or pieces of cloth. Clean away all debris inside the pump and clear any debris out of the water tubes. Reassemble and hook up the pump again and test it. If cleaning the pump doesn’t put it back into working order, or if the pump housing can’t be removed, replace the pump with a new one of the same kind.

Step 6: To install the new pump, set it into position and connect the mounting bolts to the pump housing. Move the motor back into position. Tighten the drive belt (the rubber belt that connects two shafts of the motor) by prying it taut with a hammer handle or pry bar; it should give about 1/2 inch when you press on it at the center point between the two pulleys.

Step 7: Reconnect the hoses leading to the pump.

If the pump’s not your problem, other mechanical issues may be afoot. If your belts and pulleys are to blame, find out how to fix them on the next page.


Belts and Pulleys and Motors, Oh My!


The drive belt (or belts) of a washing machine may become worn or damaged, causing noisy operation or stopping the washer entirely. Fortunately, a damaged drive belt is easy to replace. Remove the back panel of the washer to gain access to the belt and then follow these steps to remove it:

Step 1: Loosen the bolt on the motor bracket and move the motor to put slack in the belt. The motor bracket is a simple metal brace that holds the motor housing in place.

Step 2: Remove the old belt and stretch a new one into place on the pulleys.

Step 3: To put tension on the new belt, use a hammer handle or a short pry bar to push the motor into position while you tighten the bolt in the adjustable bracket. The belt should have about 1/2 inch deflection, or give, when you press on it at the center point, midway between the pulleys. If the belt is too loose, it will slip on the pulleys, causing the machine to malfunction. If the belt is too tight, it will wear very quickly and will probably become so hot that it will start to smoke or smell.

Loose pulleys can also cause problems. Most pulleys are fastened to shafts with setscrews around the hub of the pulley. Remember, setscrews do not have heads so you might have to look closely to see them. These screws must be tight, or else the pulley or belt will slip. The resulting malfunction may seem to be caused by a faulty motor, but it can be corrected by tightening the pulleys and adjusting the belt. For this reason, always check the belts and pulleys before working on the motor.

In most cases, motor malfunctions should be handled by a professional; do not try to fix the motor yourself. If the motor is a universal model, however, you can change worn carbon brushes when sparking occurs, as detailed in How to Repair Appliances. To save yourself the expense of a service call, remove the motor from the washer and take it to a professional service person, then reinstall the repaired or new motor yourself. To access the motor, remove the back panel of the washer. The motor is mounted on an adjustable bracket.

As you can see, washing machines are complicated appliances with lots of moving parts. However, washers typically last around 12 years, which is not too shabby [source: Appliance.net]. With the troubleshooting tips in this article, you should be able to squeeze a few more years out of your machine and get cranking out loads of clean laundry in no time.


COVERAGE LOCATIONS FOR REPAIR SERVICES IN MOMBASA & NAIROBI

St Michael RdArea 546487Adams ArcadeJKIA airportAmboseli Lavingtonathi river areaayany estatebalozi estatebarton estateBomas of KenyaBrookhouseBrooksideBuruburu centerchai roadChiromoDagorettiDeloitteDennis PrittDennis Pritt RoadDonholmDouble Tree EstateeastleighBanana Hilleastleigh Nairobiembul bulembulbulestateFedha EstateGachieGaleriaGalot EstateGardengarden cityFive Star MeadowsGigirigitangaGithungurigithuraiGithurai 44GreenspanGroganville EstateGwengwa GardensHamza Estateforest roadHighridgeHighriseHilton hotelHurlinghamImara DaimaJerusalem EstateIndustrial areaIsinyaJacaranda Estatejames gichuru roadJamhuri EstateJKIAJogoo RoadJujajuja roadjunctionk southKabasiran LaneKabeteKabiriakahawakahawa sukariKahawa WendaniKahawa WestkalimoniKoma RockkitisuruKinoo 87KiserianKinookitengelaKanjeruKangemiKarbasiran LaneKaren areakaren hardykaren kabwagikariobangikariobangi southKilimaniKileleshwaKimendeKiandakiberaKikuyukaruraKasaranikiambu RdKiambu Areakeraraponkenya israelkenyakayolekenolKawangwareKomarocklad broke groveLand Mawelandmawelangatalangata roadLavington AreaLenanaKariobangi Light IndustryLimuru AreaMakongenimakadaramajengo areamachakos junctionmadarakaMachakosLumumba DriveLower kabeteLoreshoLimuru RoadQuickmart mallmaringoMaruruimatasiaMaziwamiremamlolongoMombasa CityMombasa RoadMountain ViewMuchathaMumwe Oak SchoolMurangamusa gitauMuthaigaMwikiMuthangariMuthigaMwihokomwimutoNairobi CityNairobi Kenyanairobi cbdNairobi SchoolNairobi Southnaivasha roadNakumattnakuruNear MeNew LoreshongaraNgong AreaNgong RoadngumonhcNjirunsaNyarinyayoNyayo EstateObungaOthaya RoadOtiendePanganiPark PlaceParklandsPeponi RoadpipelineQuick MartKiambu Roadrace-courseracecourseRaphta RoadRedhillRegenRiara RoadRiara SpringsRirutaRidgewaysRiversideRosslynRoysambuRuaiRuakaRuiruRundaRunda MhasibuRungirisafari parksandtonsantonSatellitesigiriaSouth CSouth BSouthern BypassSpring ValleystrathmoresyokimauTasiaThigiriThikaThika RoadThogotoThompson EstateThoome estateumoja 1umoja 2trmtwo riversumojaUNEPupper hillUpper kabeteutawalaOuter Ring RoadUthiru vetvihiga roadWaiyaki WayWangigeWanyeWestgateWestlandswoodley estateYaya CenterZambeziZimmermanTappanThermadorTraulsenVikingWelbiltWhirlpoolWolfLennoxRheemTraneRuudYorkLavingtonKarenNgongAthi RiverThikaKiambuLimuruWestlandsEmbakasiNairobiShimo La TewaUtangeBomboluluMiritiniMto PangaBarshebaMshomoroniMajengoKisauniShanzuChangamweMikindaniMagongoGanjoniKibokoniKizingoTudorPort ReitzBamburiMalindiSamburuMariakaniUkundaDianiLikoniMtongweNyaliKongoweaTononokaMtwapaMombasa

BRANDS OF WASHING MACHINE, COOKER, OVEN, DISHWASHER, FRIDGE, WATER DISPENSER, AND APPLIANCES WE FIX IN MOMBASA & NAIROBI

CANDYHPARISTONBAUKNECHTELBAKITCHENAIDNEFFIKEAHOOVERVON HOTPOINTINDESITBRUHMSIEMENSELECTOROLUXGERAMTONSSMEGBEKOARMCOBUSHSANYOHitachiHKCHuaweiInsigniaLoeweMedionLeEcoMotorolaOK.OnePlusPanasonicPhilipsRCAJVCSceptreSharpSkyworthSonyTCLTelefunkenThomsonToshibaVestelVizioNokiaXiaomiEngelNevirTD SystemsHyundaiStrongRealmeOppoMetzAsusAmazonCocotecNilaitBang & OlufsenContinentalEdisonDenverEdenwoodBlueHisenseASKOGrundigDacorElectroluxGaggenauFisher & PaykelDCSEquatorHaierJenn-AirKenmoreHobartHotpointMarvelMaytagMagic ChefNorcoldRoperSub-zeroThermadorTraulsenVikingWelbiltTappanWolfFurnace & HVACAmerican StandardAmanaBryantCarrierColemanGeneral ElectricHeilGoodmanLennoxRheemTraneRuudYorkZanussiMikaMieleFrigidaireKitchenaidWhirlpoolDaewooSamsungBosch RepairLG